In survival first aid, the triangular bandage is an important item that should be part of every medical kit. Available as a stand-alone item or improvised from a bandanna, neckerchief, or shemagh, the triangular bandage has proven to be a versatile and lightweight tool in the off-grid medic’s toolbox. Every medical kit should have several.
Over the centuries, bandannas — which originated from a colorful headdress in India called bandhana, from the Sanskrit word for “bond” — have morphed into an item which can be seen on the outfits of everything from scouts to sailors to cowboys. In some cases, kerchiefs have become part of ceremonial costumes or uniforms. In practical terms, however, they can serve to wrap a wide variety of injuries incurred in the backcountry or other austere settings. The triangular bandage is useful for any situation where immobilization is helpful for healing or for transport. It can be used to treat sprains, broken bones, bleeding injuries, and much more.
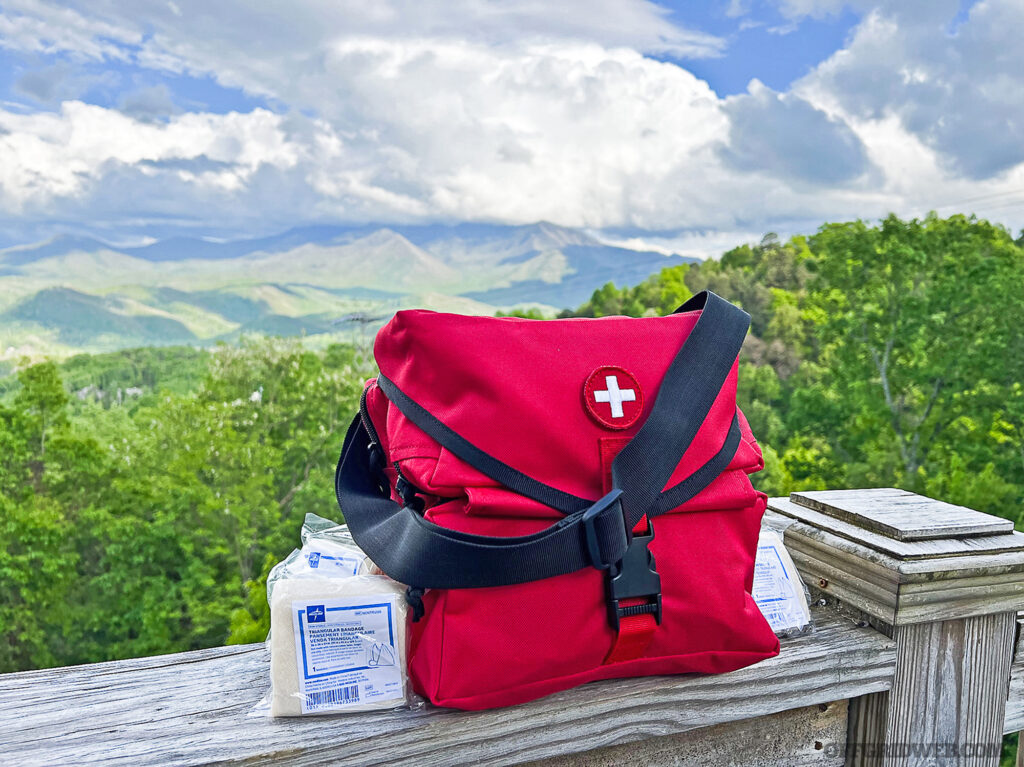
Above: Every medical kit should have more than one triangular bandage.
The bandage can be used in conjunction with a number of other medical items to achieve stabilization. It can be improvised into a tourniquet with a stick or used as a wrapping to pad and immobilize a sprain in tandem with a splint. By itself, it can serve to help apply pressure to and pack an open wound.
Today, we’ll demonstrate a number of different ways for the family medic to use a standard-sized triangular bandage.
DISCLAIMER: This is a general overview and not a comprehensive guide to treating sprains, broken bones, or other injuries. If symptoms worsen, seek professional medical advice as soon as possible. Photos by Amy Alton
Making A Triangular Bandage
Commercially produced triangular bandages are cheap and can be bought in quantity, but if you have some old cotton sheets, you can easily make your own supply. Simply use scissors to cut out a 40×40-inch cloth square, then either fold it into a triangle or cut diagonally to make two separate triangular bandages.
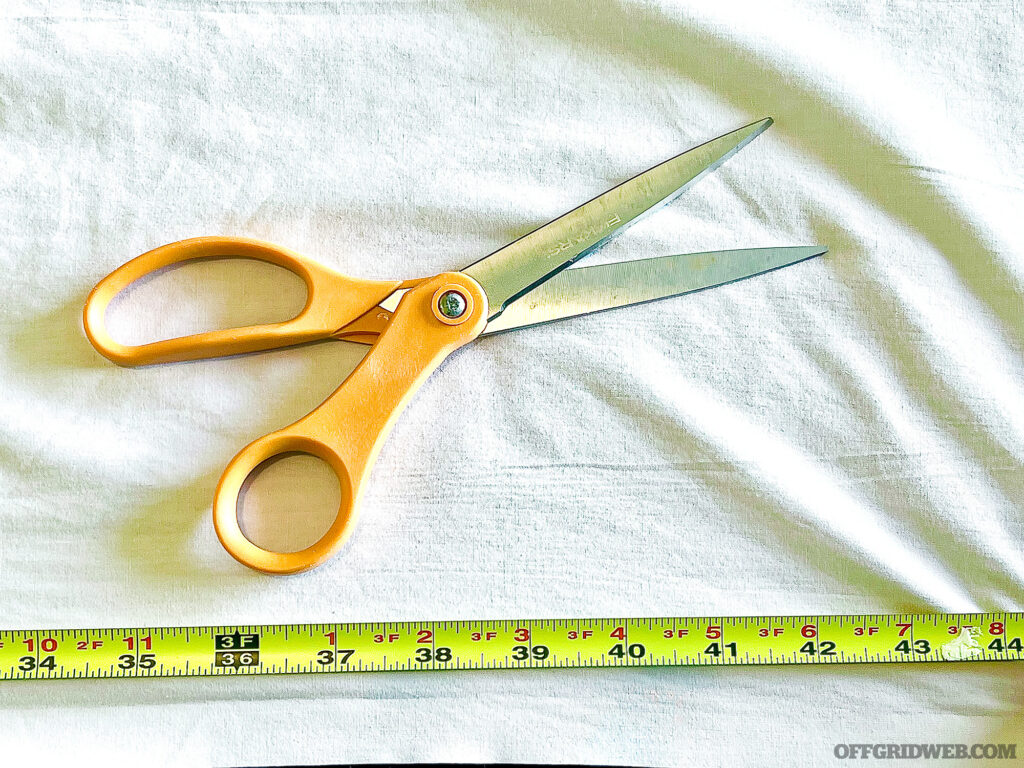
Above: Standard triangular bandage dimensions are 40 by 40 by 56 inches.
Sanitize the bandage by boiling in water, using a pressure cooker, or soaking in a disinfectant solution. This will allow you to use it safely in an open wound. Store in a fresh plastic bag. It might not be entirely sterile from a medical standpoint, but it’ll stay clean. Other, less conventional, options include baking in an oven for two hours at 300 degrees F or ironing at a high heat for three minutes.
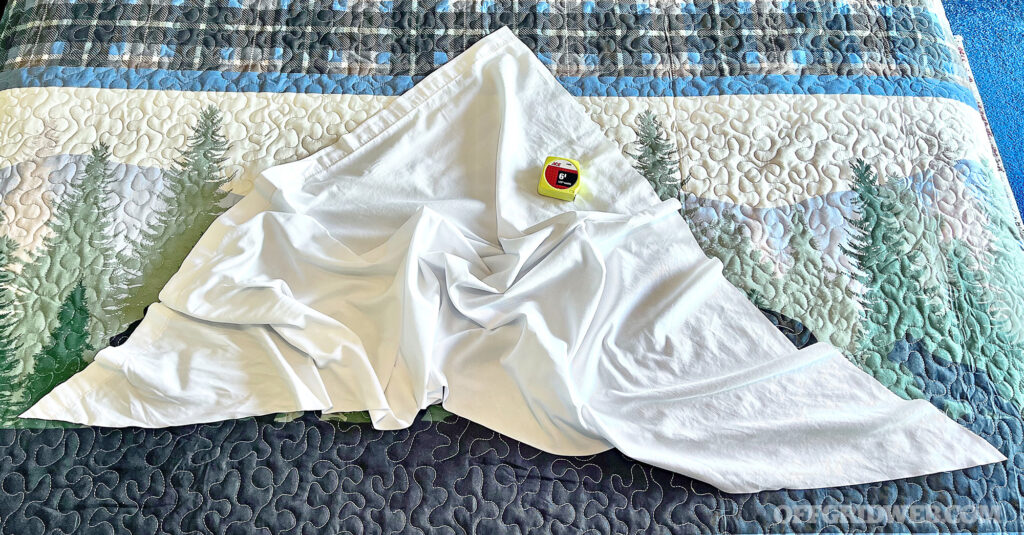
Above: Old sheets work well as improvised bandages.
Arm Injury
The most well-known use for a triangular bandage is the classic sling. With arm injuries, a sling will provide both immobilization and comfort. Securing the arm against the body reduces the chance of further damage.
In a rib injury, this sling is sometimes used, with added padding against the chest, to decrease pain experienced by moving the arm.
The simplest way to make a sling is to lay out the bandage under the injured arm so that one pointy end goes over the shoulder, another points to the floor, and the third extends beyond the elbow.
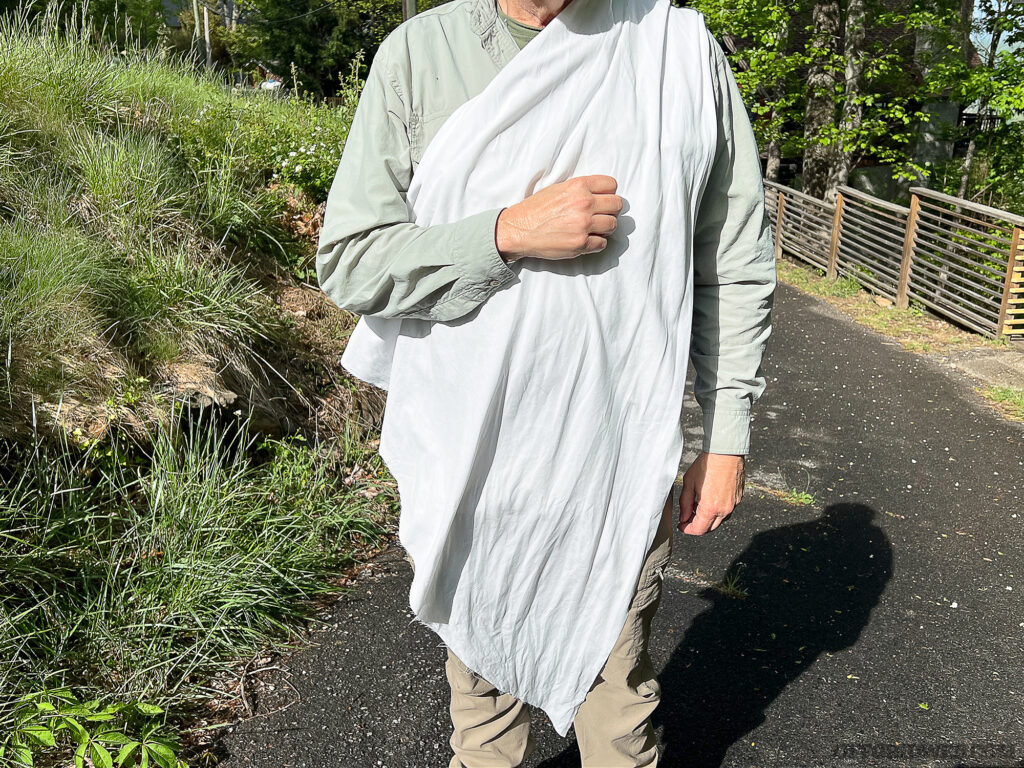
Above: Step 1 – Drape in front with the tip of the triangle toward the elbow.
Bring the lower end of the bandage up over the other shoulder, leaving the arm cradled.
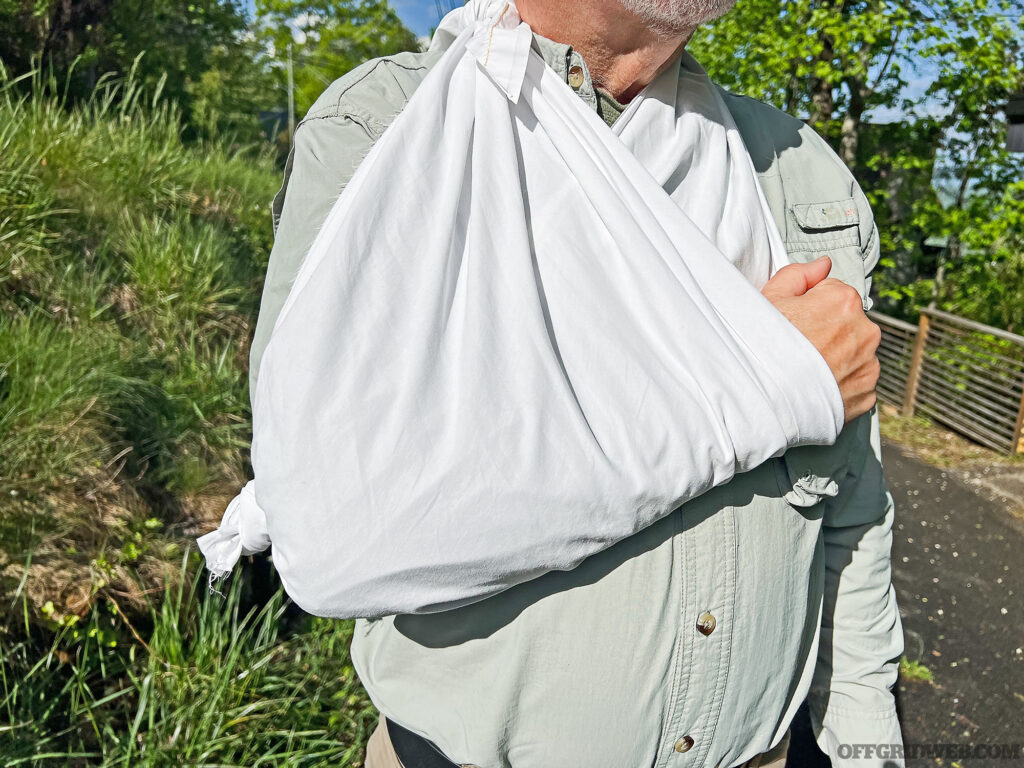
Above: Step 2 – Lift the bottom end over the shoulder and tie. Make a knot at the elbow to stabilize.
Tie the ends of the bandage behind the neck. Fasten the edge of the bandage by the elbow with a safety pin or by tying a knot. If needed, add some padding behind the neck.
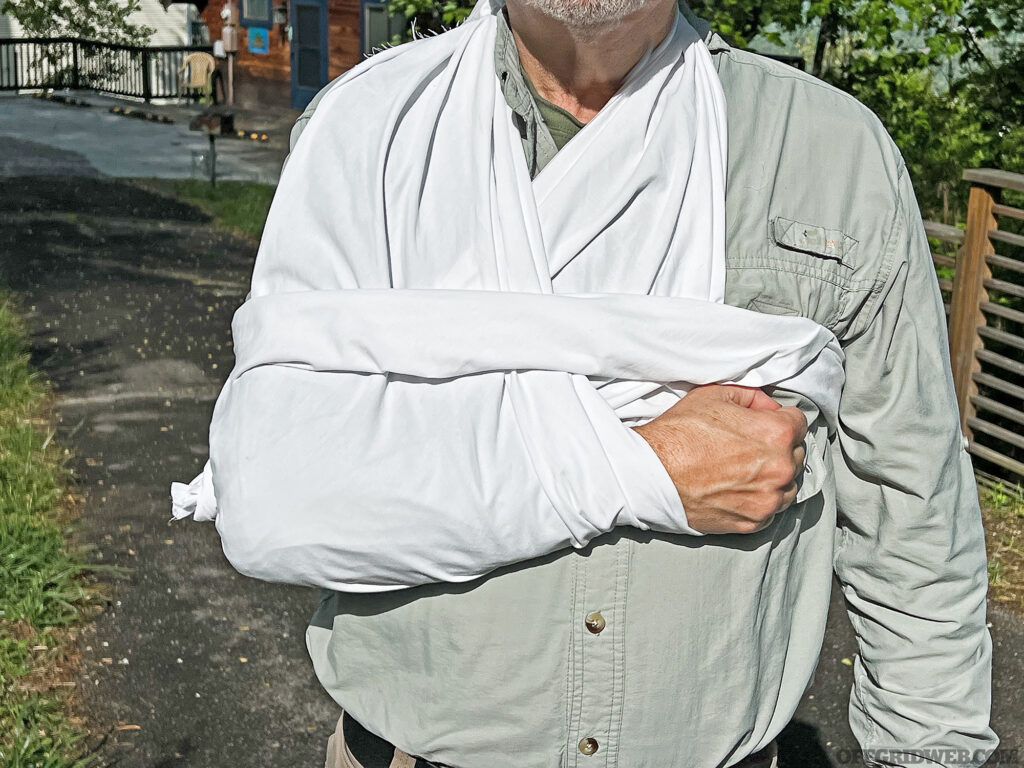
Above: Step 3 – For added support, wrap a swathe around the torso.
For even more support, an additional bandage can be used around the injured arm and chest horizontally. This wrapping is known as a “swathe.”
Ankle Sprain
One of the most common injuries on the trail is the ankle sprain. Uneven terrain in the form of rocks and roots cause an unbalanced traveler to end up with a painful injury. In this case, elastic wraps are most commonly used for this injury, but a properly placed triangular bandage will also work to provide the stabilization needed.
Fold the bandage until it is 3 to 4 inches wide, then place the center on top of the foot and wrap once under the foot. Bring each end behind the ankle, cross once, and move them together in front of the ankle. Cross the ends again.
Slide each end underneath the vertical straps created when you moved the wrap from under the foot to the back of the ankle. Tug on each end to tighten and secure with a knot in front of the ankle.
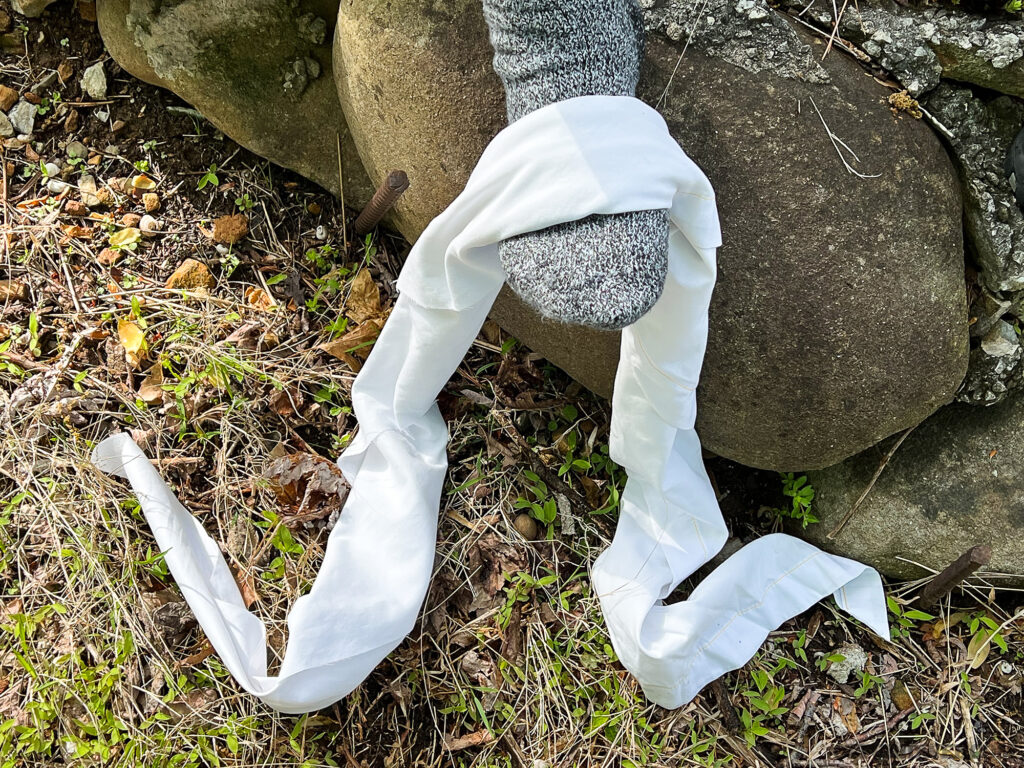
Above: Step 1 – Start on top of the foot.
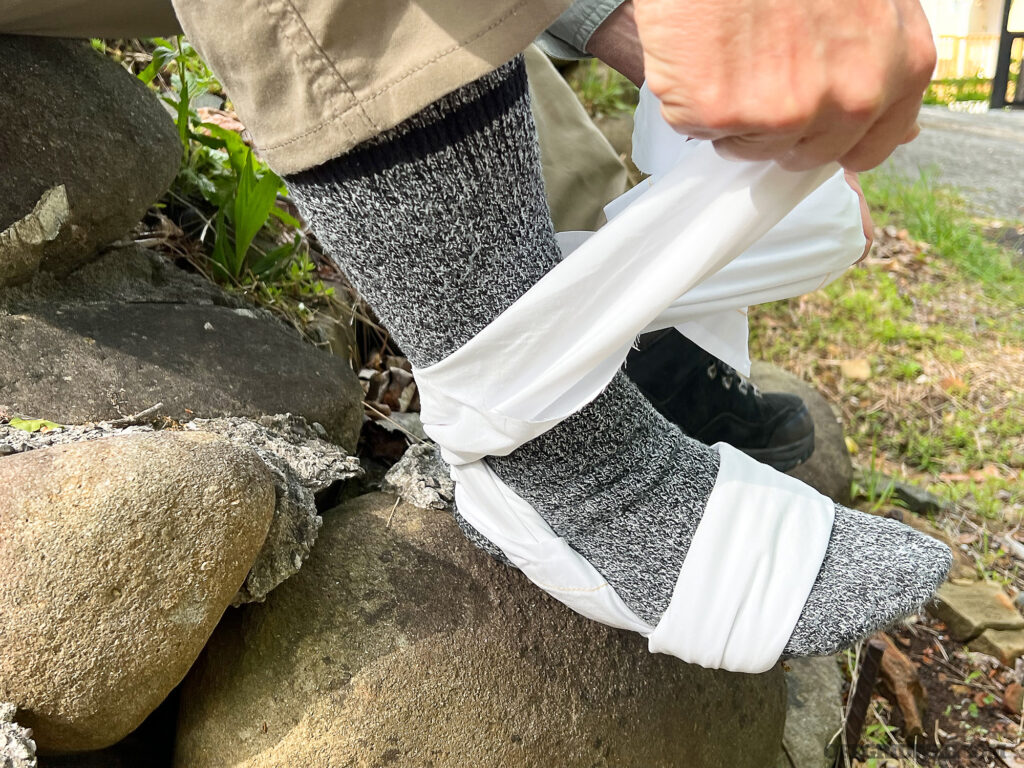
Above: Step 2 – Go around the back of the ankle.
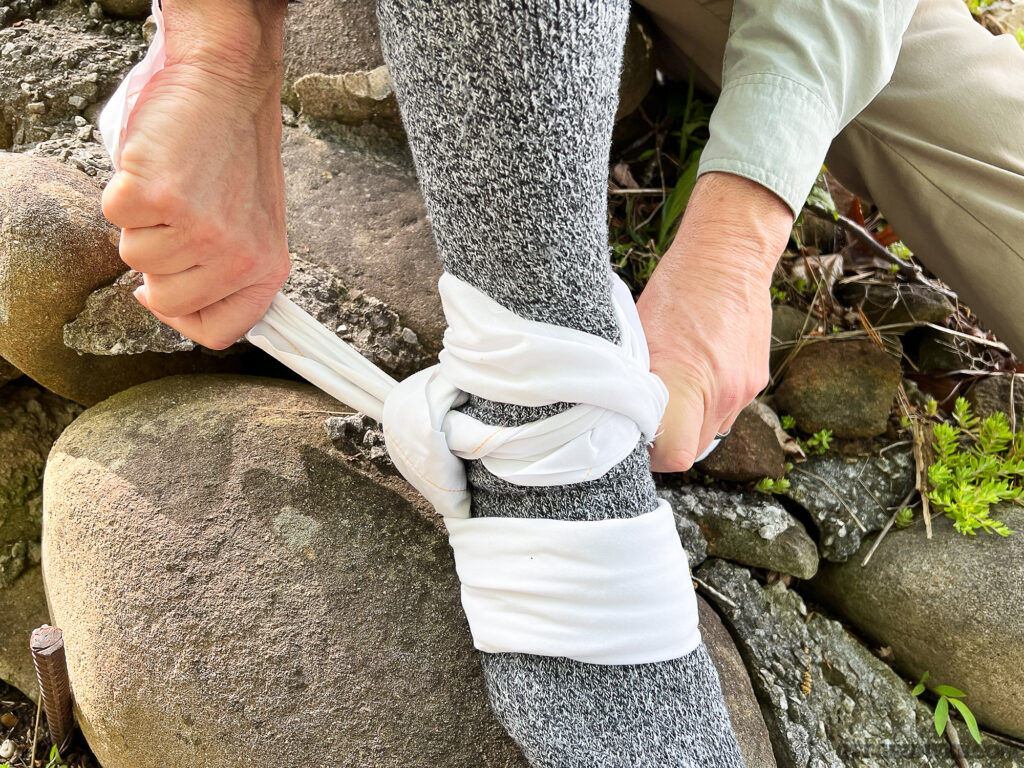
Above: Step 3 – Slide each end back under the ankle strap.
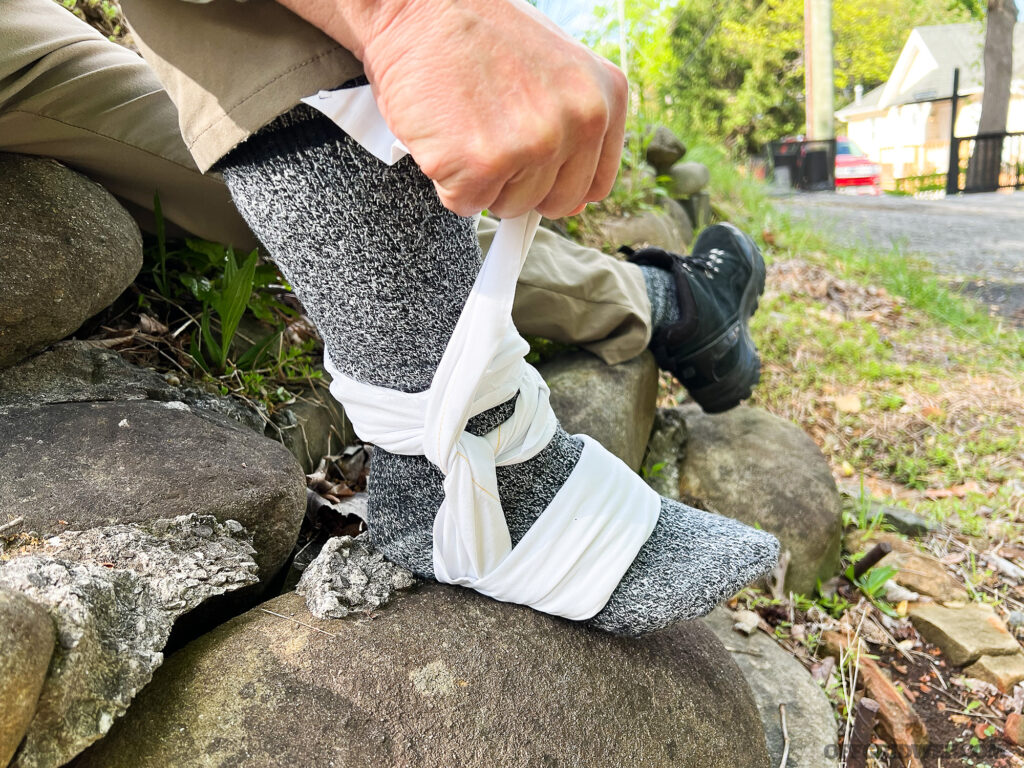
Above: Step 4 – Pull each end up to stabilize.
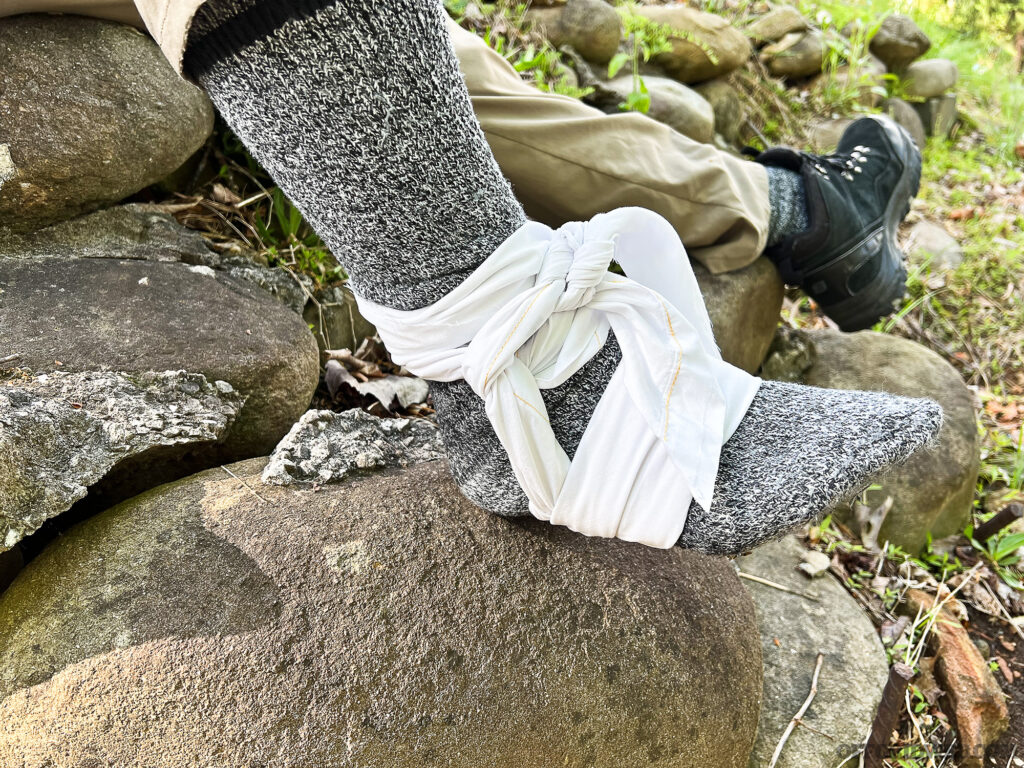
Above: Step 5 – Tie the ends in front.
Head Injury
A head wound can be significant in various ways. Superficial cuts on the scalp can bleed profusely and require bandaging. A concussion can alter mental status and even cause loss of consciousness. Bleeding could also occur inside the skull, putting the victim’s life at risk. Even vision could be affected in certain injuries.
The family medic can’t control all of these issues, but a simple head wrap can help control the superficial bleeding that often happens with a traumatic injury. Although gauze rolls are most commonly used, a triangular bandage can serve the purpose as well.

Above: Step 1 – Wrap around the forehead with the triangle covering the head.
Starting at the long side of the bandage, fold it over 2 inches and wrap this section around the forehead above the eyebrows, leaving a triangle covering the scalp. Cross both ends of the bandage around the back of the head and over the triangle covering the scalp. Then, cross around to the front and tie. Tuck loose ends under the folds of the wrap.

Above: Step 2 – Tie the ends together over the edge of the triangle.
If you’re dealing with a burn, you should moisten the bandage to avoid sticking.
Shoulder Injury
Ordinarily an awkward area to wrap, a triangular bandage works well to cover an open shoulder wound and help stabilize the area.
Fold the top of long end of the triangular bandage down about 4 inches, then flip up the bottom of the triangle until the tip meets the long side. Drape diagonally so one of the pointy ends is below the unaffected armpit (axilla) and the other is over the injured shoulder. Then, wrap around the back of the shoulder, under the affected armpit, and around so that the end of the bandage meets the other end. Tie to secure.
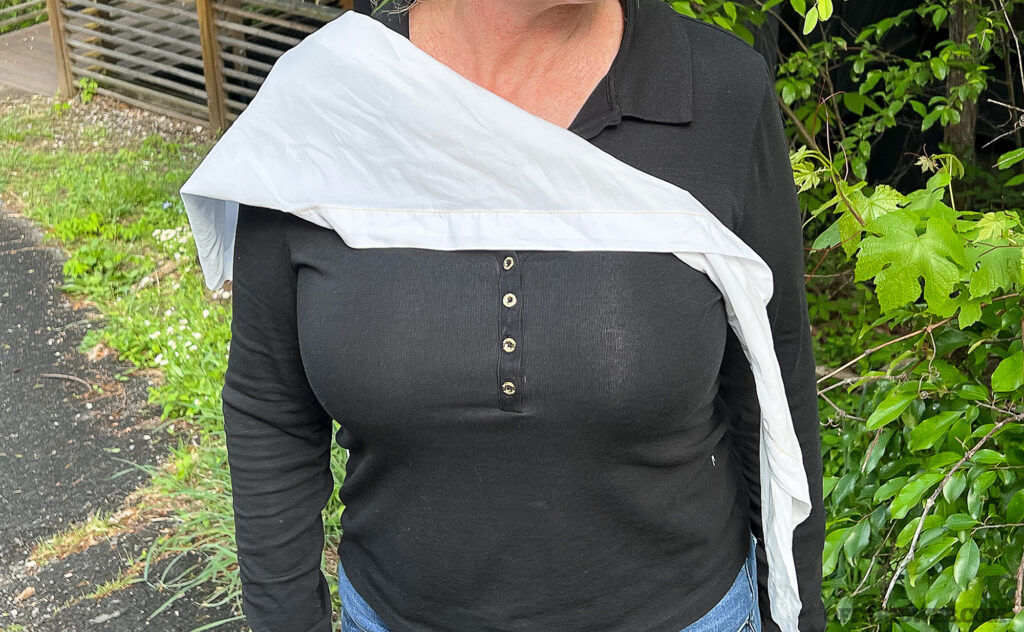
Above: Step 1 – Drape across with the wide end over the affected shoulder
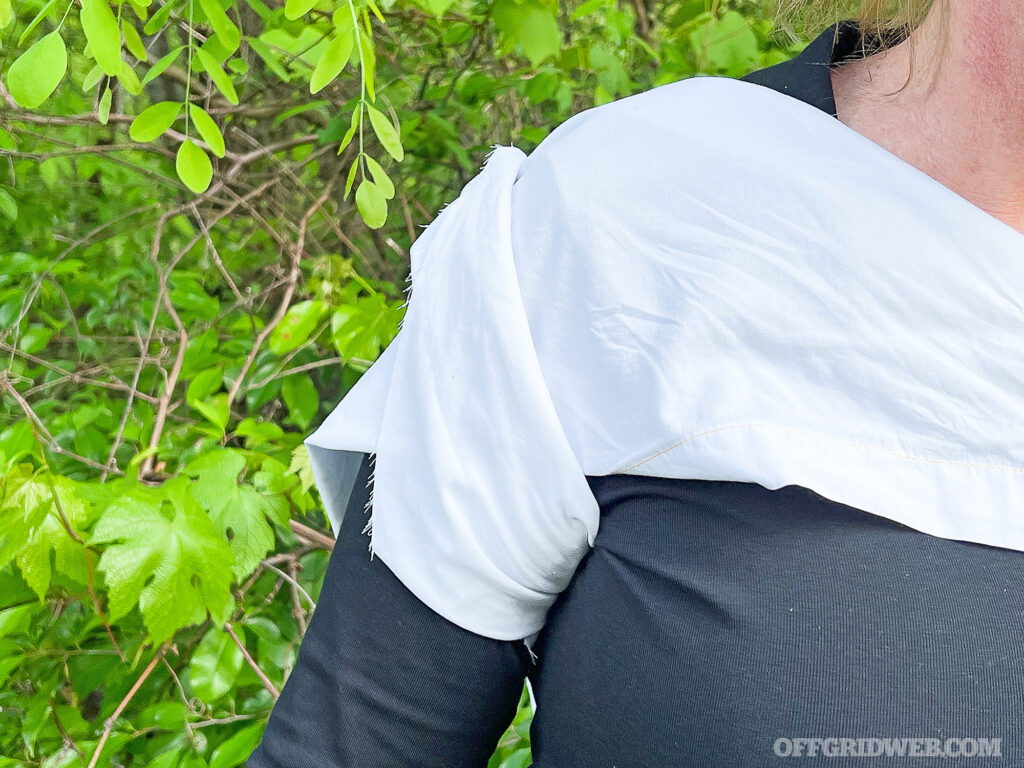
Above: Step 2 – Go in back and around the armpit.
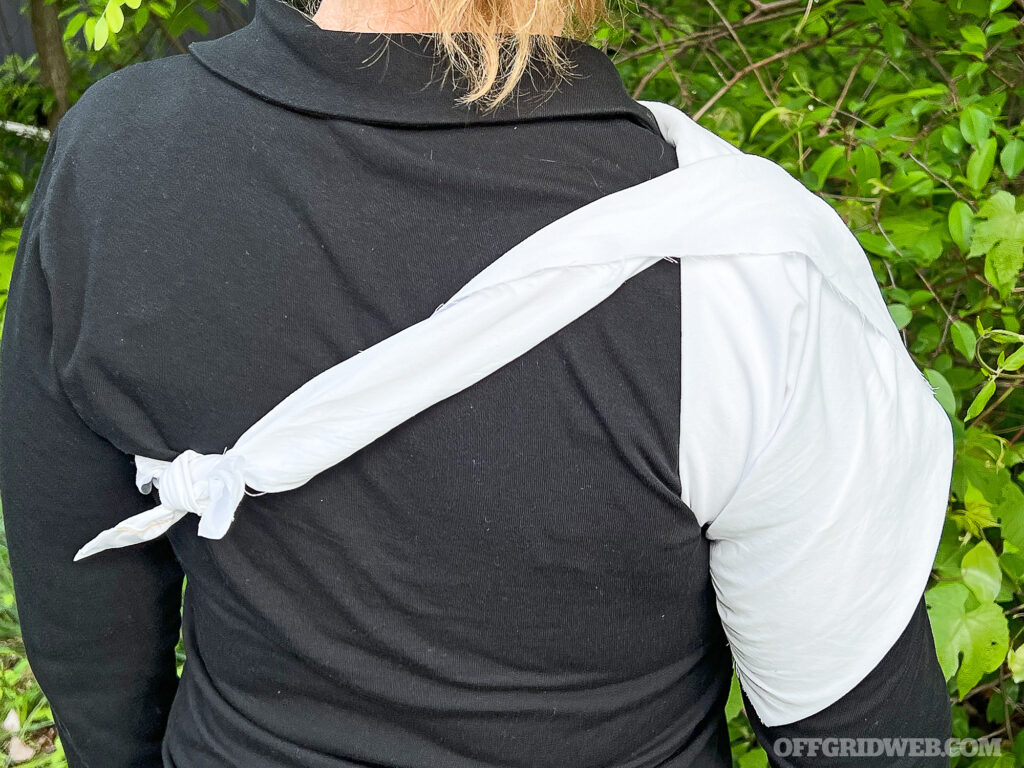
Above: Step 3 – Tie in back.
Hand Injury
Performing activities of daily survival can lead to injuries relating to the hand, especially if protective gloves aren’t used. In many situations, group members will be asked to carry out duties to which they’re not accustomed. The family medic should always be prepared to prevent and treat injuries relating to the hand; family members who can’t use their hands lose the ability to be an asset in the fight for survival.
If the hand injury is a burn, moisten or use some salve beforehand to keep the bandage from sticking to the skin. If there’s a chance of re-bleeding, use extra bandages to provide a bulky barrier for added pressure.
Spread out the triangular bandage on a table or other flat surface. Place the victim’s back of the hand on the center area of the bandage. Fold the bandage over the palm so that the point is at the level of the wrist. Roll both ends of the bandage down until you reach the wrist on each side. Cross the rolled ends over the wrist and around the back of the hands at least twice. Then, tie. This covers the hand completely.
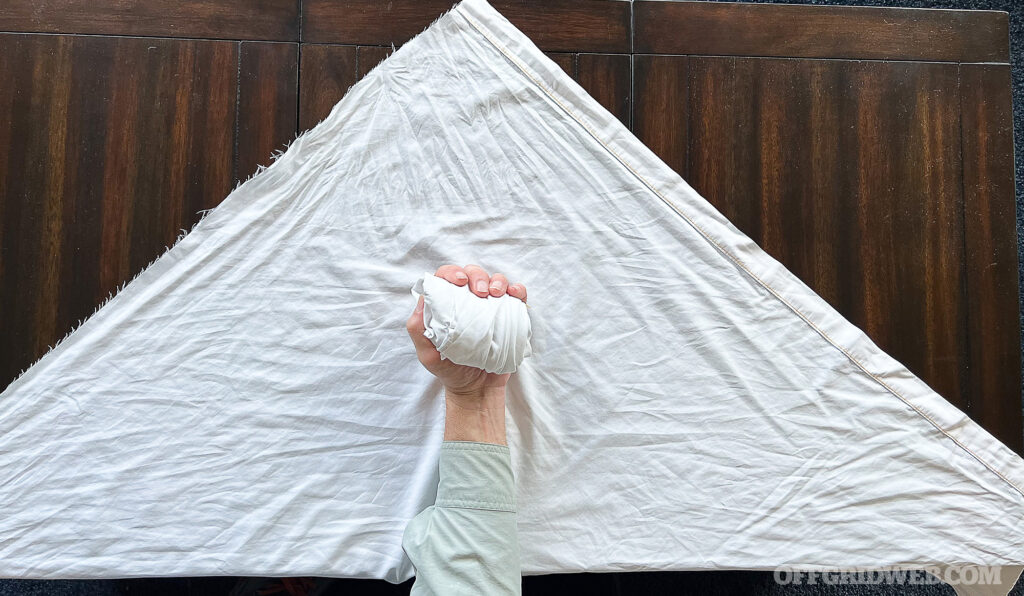
Above: Step 1 – Spread out the triangular bandage and position the hand.
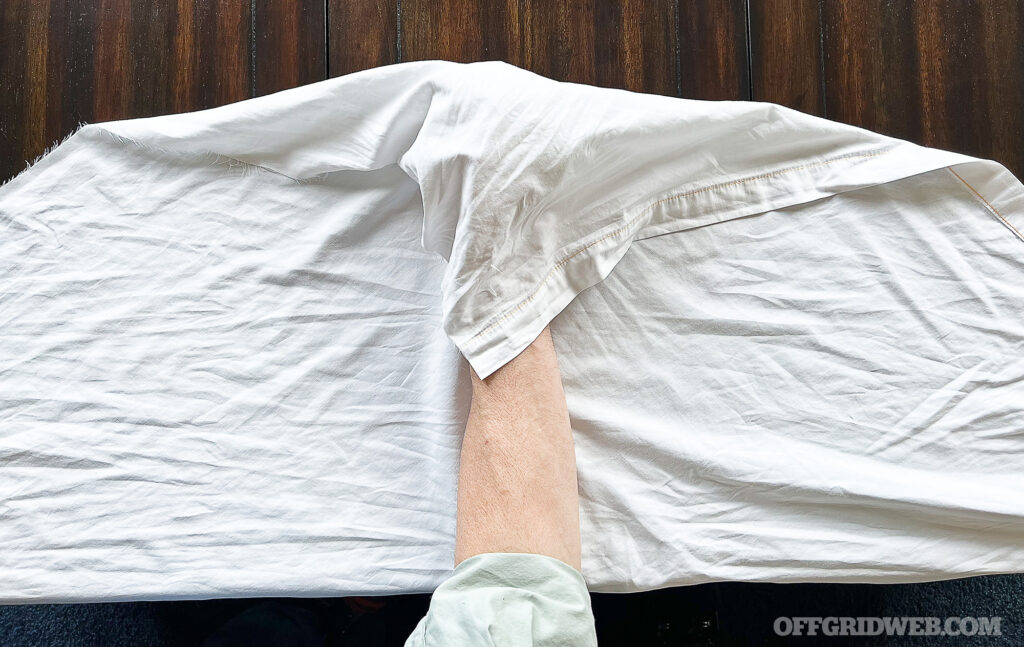
Above: Step 2 – Bring the tip of the triangle down over the wrist.
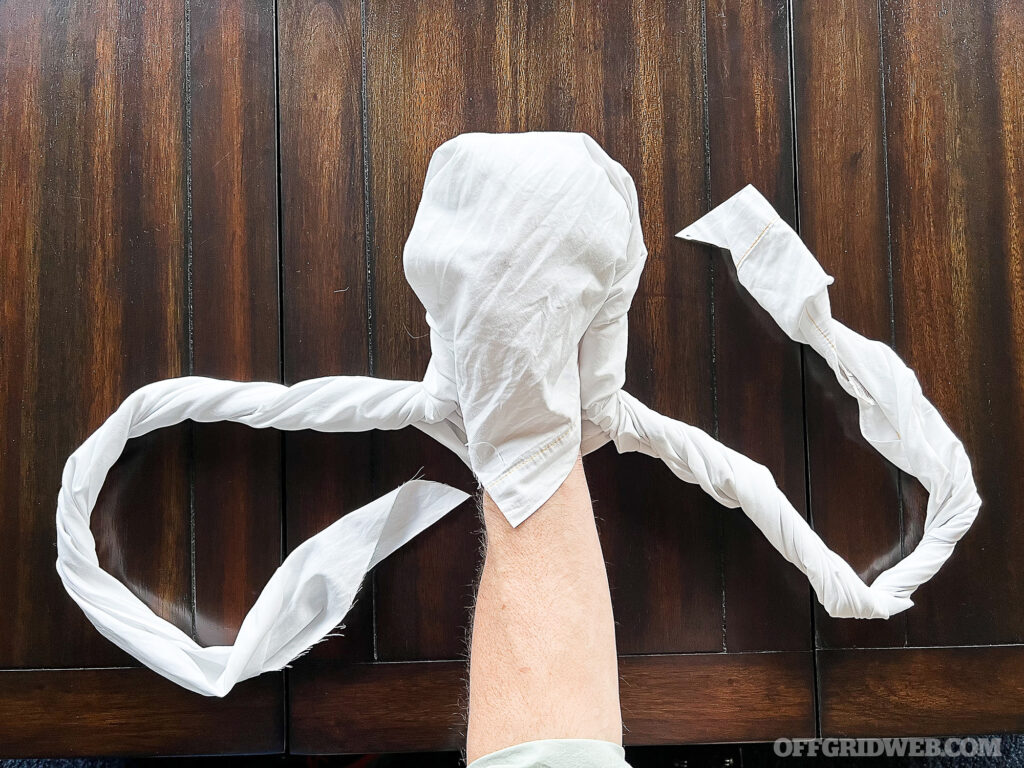
Above: Step 3 – Roll the ends until they reach the wrist on each side.
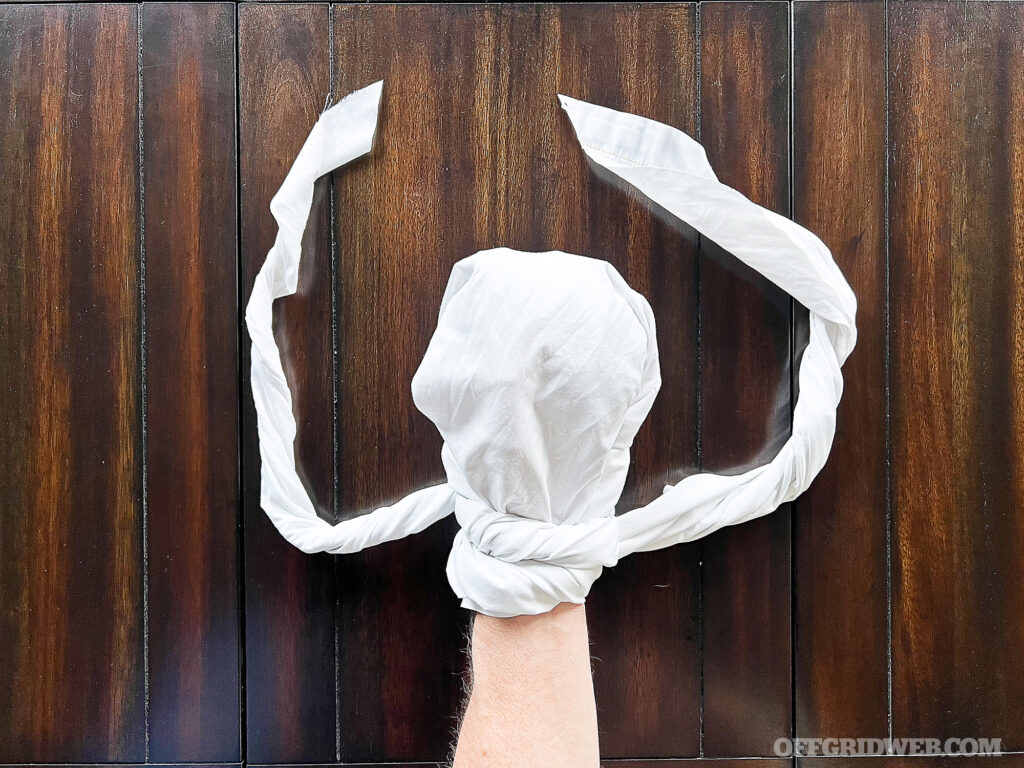
Above: Step 4 – Wrap the end around the wrist.
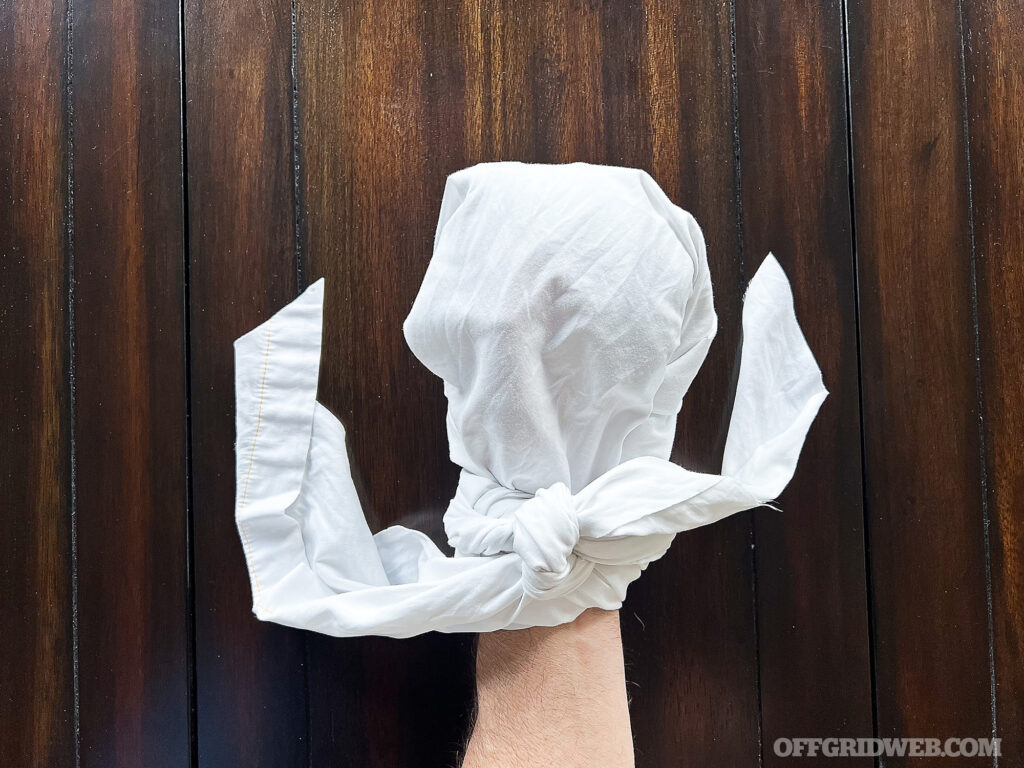
Above: Step 5 – Tie the ends.
Eye Injury
An eye injury can disorient and disable a person, and a tight wrap could worsen the situation. In chemical emergencies, be sure to irrigate and flush out the affected eye(s) thoroughly before applying a bandage. Using an improvised or a commercial eye shield, a triangular bandage can hold such a barrier in place to prevent further injury. This is especially useful if a foreign object has impaled the eye.
With eye injuries, it’s important to realize that both eyes move in tandem with each other. Therefore, it’s best to cover both eyes if further eye movement would worsen the situation.
If you don’t have a commercial eye shield in your kit, you can improvise a shield with the bottom of a paper cup. Take a gauze 4×4 pad and cut an opening that fits the cup tightly enough to keep it stable and add some padding under the rim for comfort. Place over the injured eye. Use some padding over the other eye as well, and then use your triangular bandage, folded to about 4 inches wide, to cover both eyes. Go around the head twice, tie in the back to secure, and tuck the loose ends.

Above: Step 1 – Cover the injured eye with the bottom of a paper cup.

Above: Step 2 – Cover the other eye with padding.

Above: Step 3 – Use the triangular bandage to stabilize the dressings over each eye.
Jaw Injury
A number of circumstances can lead to trauma to the jaw, possibly even a fracture. A triangular bandage can be used to immobilize the jaw in place.
Fold the bandage flat lengthwise until it’s 4 inches wide. Start on the chin and bring ends behind the ears to the top of the head. Cross the ends and slide the crossed section just over one ear. Wrap one end behind the head and the other across the forehead. Tie both ends over the opposite ear.
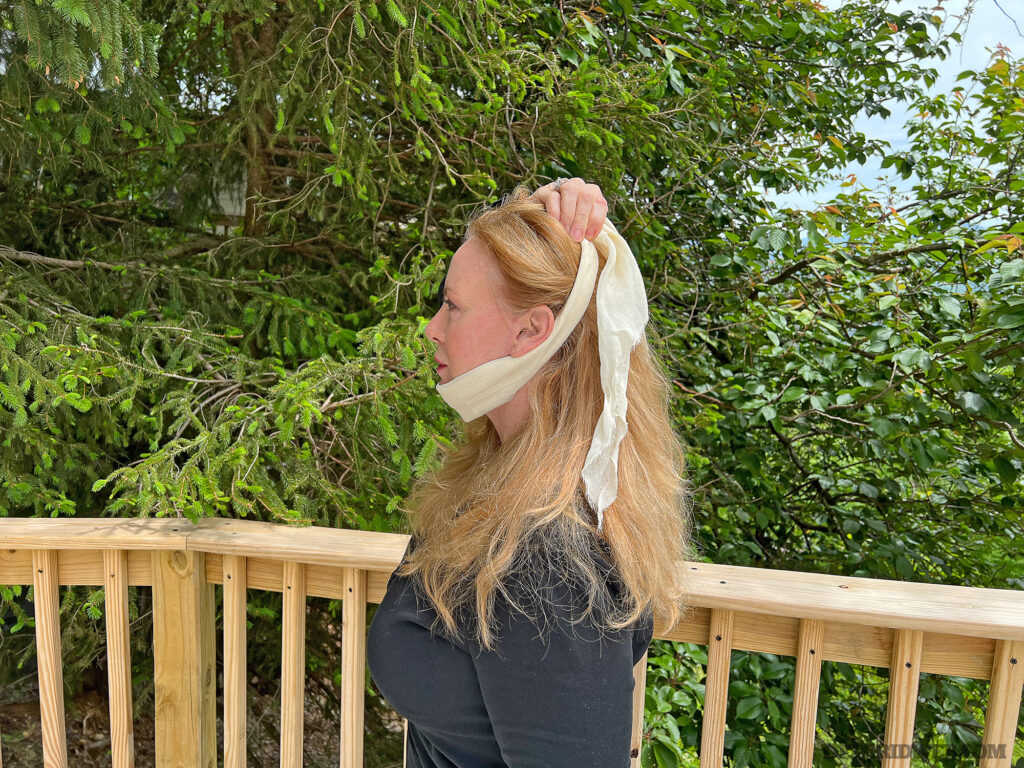
Above: Step 1 – Start over the chin and pull each end over the head.
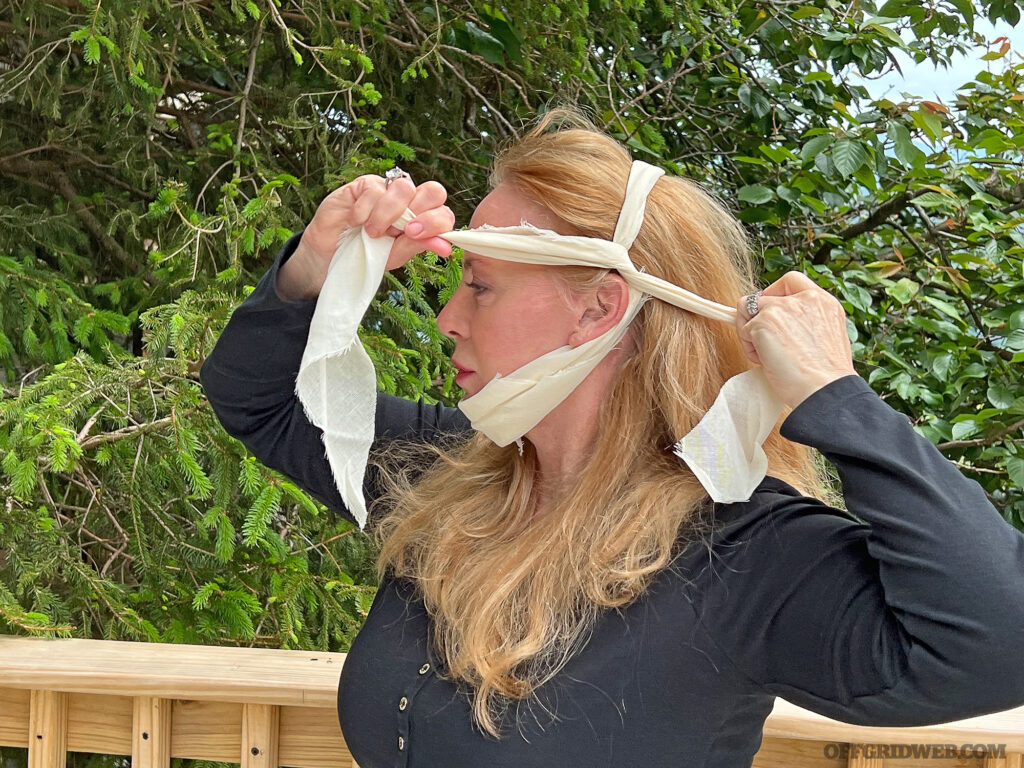
Above: Step 2 – Cross the ends over one ear.
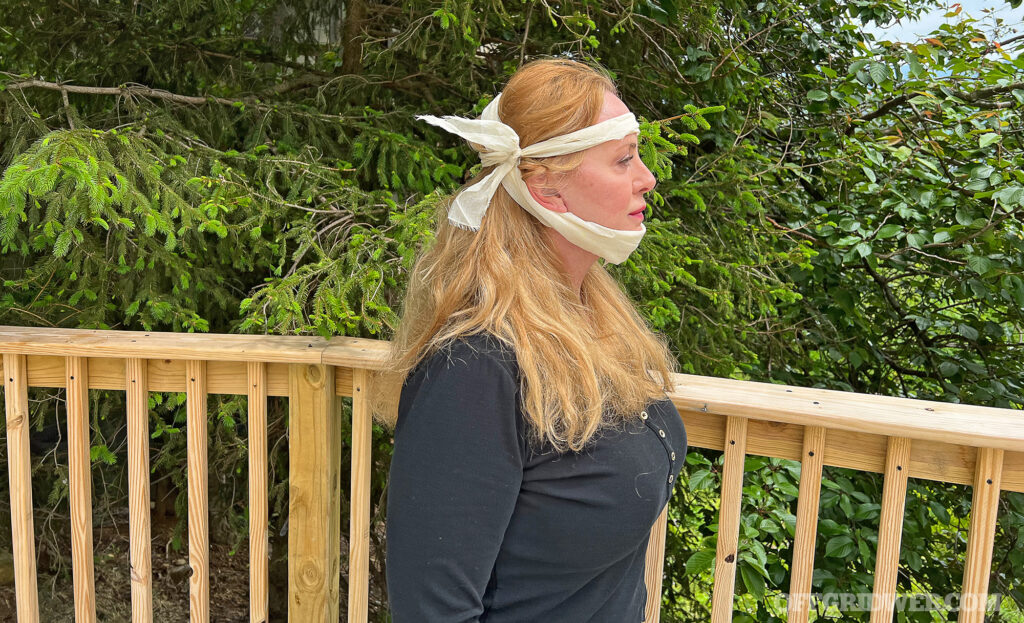
Above: Step 3 – Tie the end over the other ear.
Stabilizing A Splint
Splints perform the important task of immobilizing an injured limb in a natural position. They help prevent re-injury that can occur as a result of jostling during transport. Splints facilitate the healing process. To keep them in place, triangular bandages can be used as padding or in the place of elastic wraps. There should be at least two securing points.
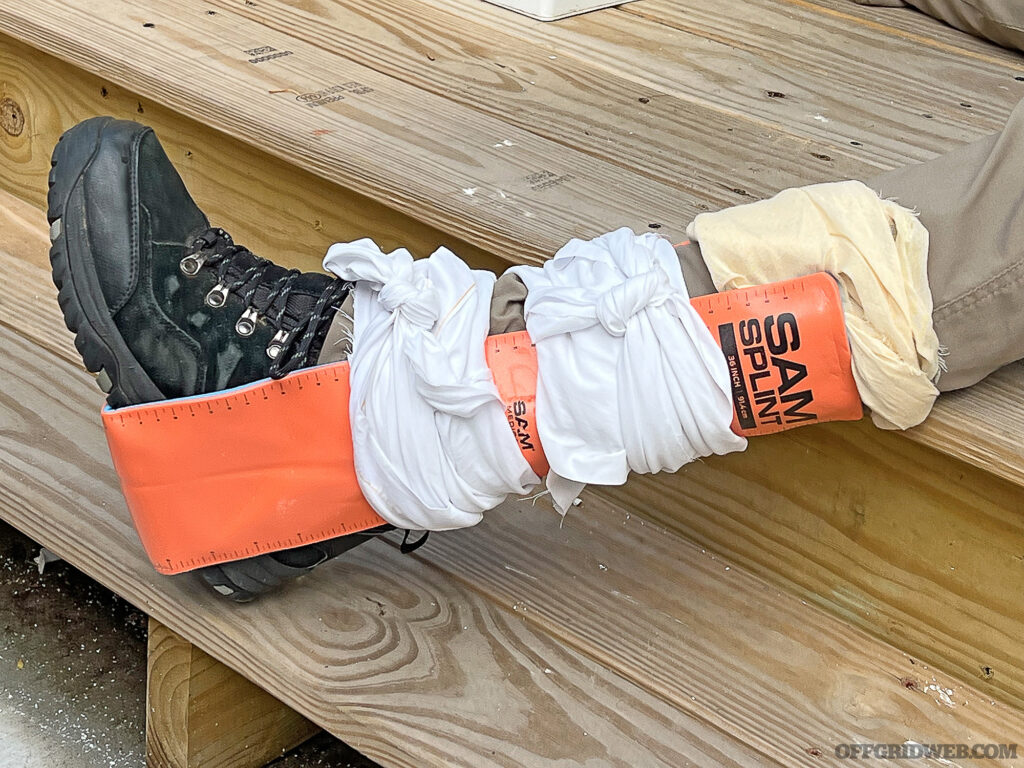
Above: Stabilizing and padding splint with triangular bandages.
Improvised Tourniquet
A tourniquet is a mandatory item for any medical kit. In most cases, commercial tourniquets like the C-A-T have proven their worth in everything from the battleground to the backcountry. A purpose-built tourniquet will be easier to use and more consistent than any improvised solution. However, when a military-style tourniquet isn’t available, a triangular bandage can be used as an effective way to stop even heavy bleeding.
Fold the triangular bandage so it’s flat on the extremity and at least 2 inches wide. Wrap around the limb tightly, but evenly. Tie the two ends in a single knot, then place a rigid object like a stick across and tie another knot. The stick serves as a “windlass” device similar to that used in military-style tourniquets. Twist the stick until bleeding stops, then secure it by placing a knot underneath the extremity to maintain pressure.
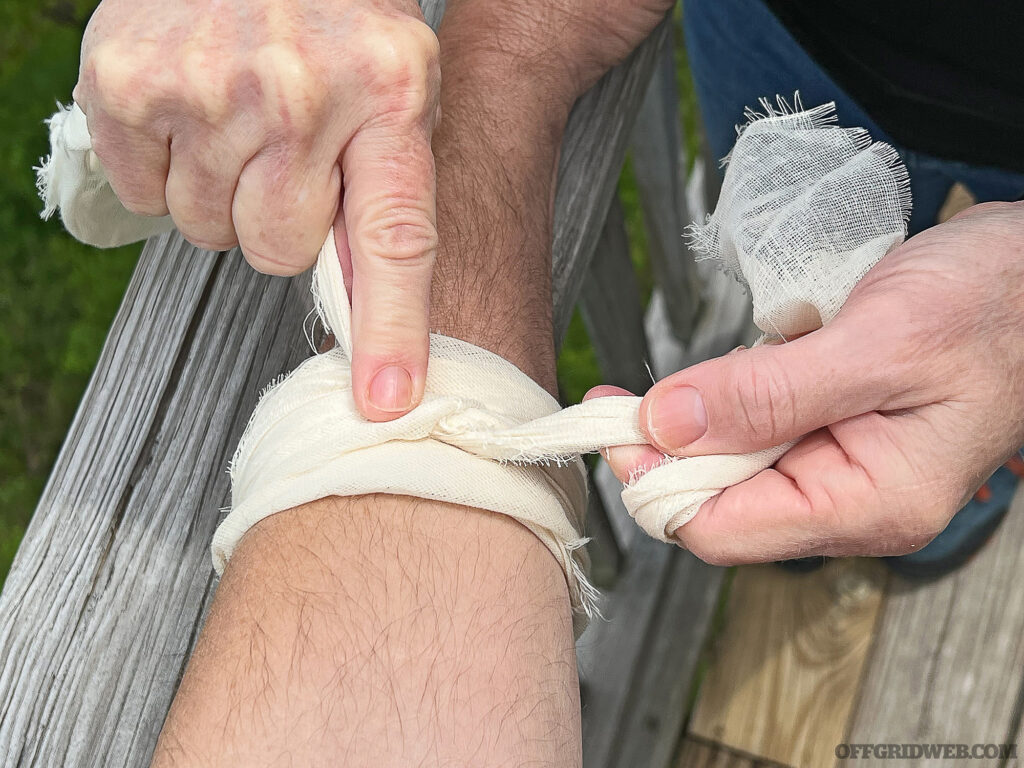
Above: Step 1 – Fold to 2 inches wide, tightly wrap above the bleed, then tie down.
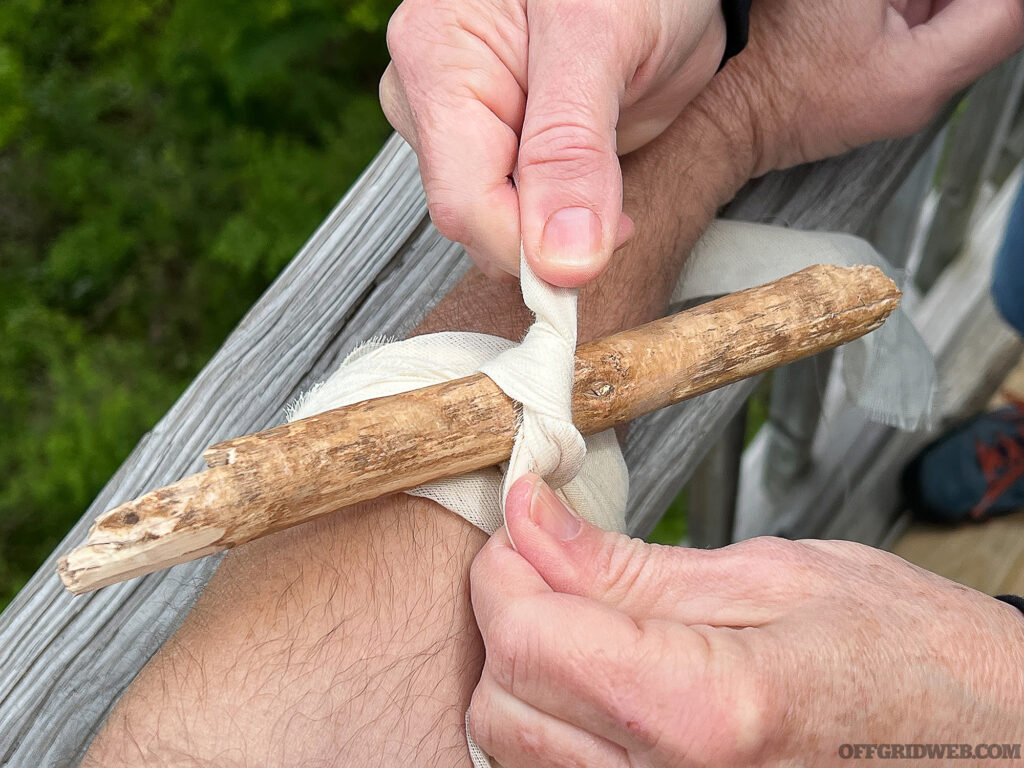
Above: Step 2 – Place stick or other “windlass” and tie once over it.
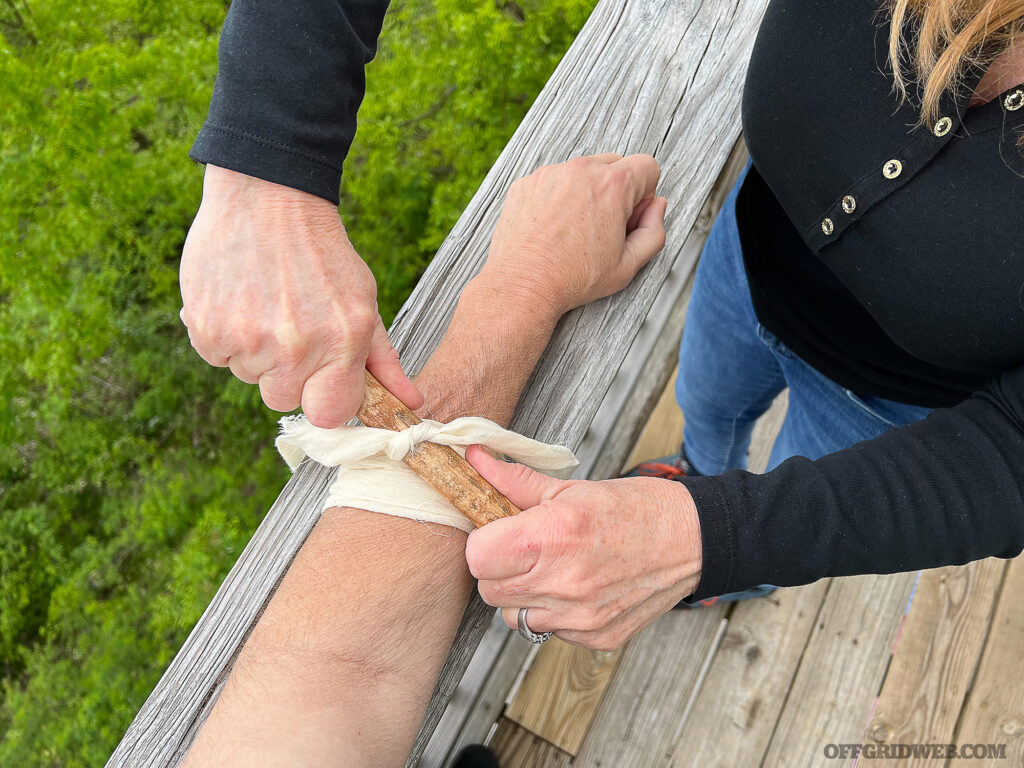
Above: Step 3 – Windlass stick in place; twist to provide pressure.
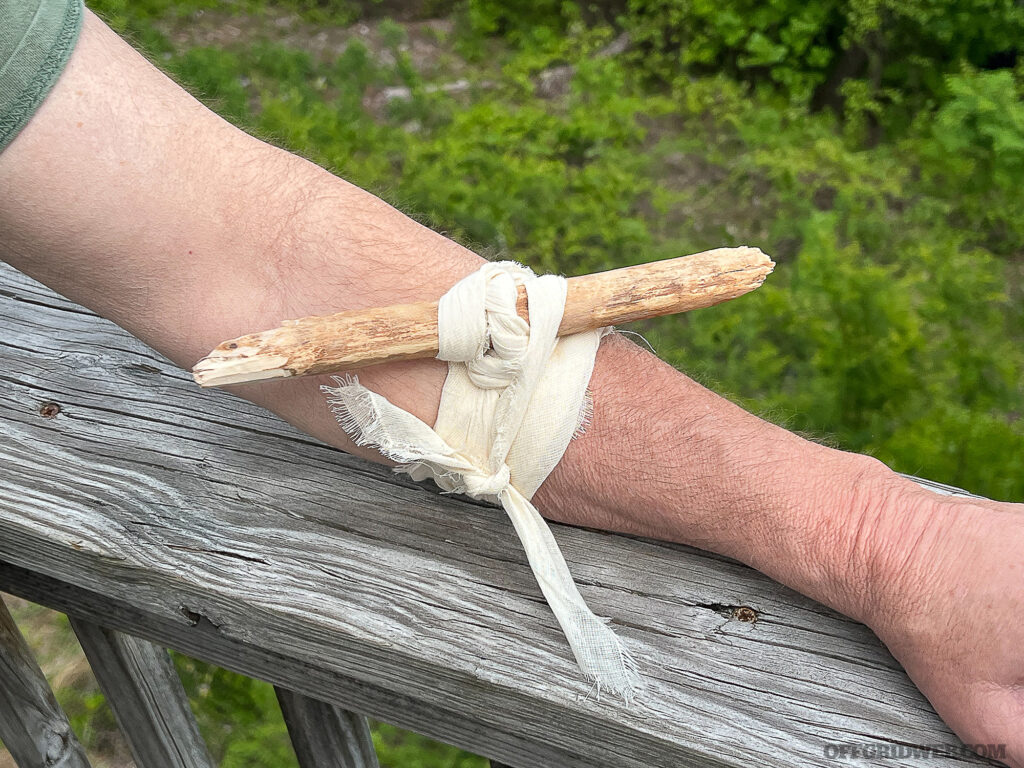
Above: Step 4 – Secure windlass stick in place by wrapping and placing a knot.
Other Uses For Triangular Bandages
- As a component of a water filter. The permeable nature of the fabric allows the bandages to filter out algae and debris from questionable water in advance of disinfecting by boiling, bleach, iodine, water purification tabs, or UV light.
- As a face mask. A triangular bandage can be used, cowboy-style, to protect against dust and other irritants. It doesn’t prevent the passage of microbes, however.
- To make fire. If your triangular bandage is made of cotton, it’ll work well as emergency tinder to make fire. Shred the fabric into a nest of fibers for easier ignition.
- As improvised cordage. Paracord is a lot better, but you can cut your triangular bandage into strips to tie together and fasten materials in a pinch.
- To signal for help. Attach to a long stick and wave like a flag, or unfold and lay the bandage on the ground with rocks at the corners to create a directional marker that’s visible to passing aircraft.
To get the most out of your medical supplies, it’s worthwhile to brainstorm different possible uses for each item. As you expend materials, you’ll find that your improvisations may make the difference between success or failure off the grid.
About the Author
Joe Alton, MD, FACOG, FACS, is a retired Fellow of the American College of Surgeons and a Life Fellow of the American College of OB/GYN. He’s a disaster medical preparedness advocate, outdoor enthusiast, and New York Times/Amazon bestselling author of several award-winning books, including The Survival Medicine Handbook: The Essential Guide For When Help Is NOT On The Way now in its 700-page fourth edition. He’s also the designer of an entire line of quality medical kits for the austere medic at his website at doomandbloom.net, which has over 1,400 articles, podcasts, and videos on medical preparedness.
Read More
Subscribe to Recoil Offgrid's free newsletter for more content like this.
Editor's Note: This article has been modified from the original print version for the web.
The post Triangular Bandage: More Than A Dozen Uses appeared first on RECOIL OFFGRID.
By: Patrick Diedrich
Title: Triangular Bandage: More Than A Dozen Uses
Sourced From: www.offgridweb.com/survival/triangular-bandage-more-than-a-dozen-uses/
Published Date: Tue, 06 Feb 2024 12:00:37 +0000
------------------------
Did you miss our previous article...
https://bushcrafttips.com/bushcraft-news/is-moss-edible-or-poisonous-6-types-of-moss-you-can-eat
 What is BushcraftSurvival SkillsToolsVideosBushcraft CampsBushcraft KitsBushcraft ProjectsPrivacy PolicyTerms And Conditions
