In the book, How to Survive in the Woods by Bradford Angier released in 1969, the author asserts the following about a survival firearm: “The best survival weapon, it follows, is a flat and hard shooting rifle. There is no need to append that it should be rugged, accurate, and durable.” Angier, considered to be one of the foremost voices in the survival community prior to the explosion of internet survival stars, formulated a very logical argument for carrying a rifle as a tool to put meat over the fire. In 1969, the leading .22 rifles on the market were the Armalite AR-7, Marlin model 60, Ruger 10/22, and Remington Model 66.
Even today, despite a couple of them being out of production, these firearms are among the best available, and countless used gun racks have excellent working examples of these durable wilderness tools. Angier was a prolific writer and had dozens of titles to his name. In an even earlier book, he advocated for a centerfire rifle, shotgun, and .22 for long-term living away from society. This practical combination will work just as well today as it did in his era, though the cost of feeding them has made practice with the centerfires much more expensive. Angier’s survival firearm recommendations also added fuel to the “if you only had one gun” campfire debate. Would it be better to have a .22 for taking small game to fill the pot once and also allowing you to carry more ammo, or would it be better to have a larger centerfire rifle to take one animal that you could preserve the meat to create days of rations? The appropriate solution is still a popular philosophical debate.
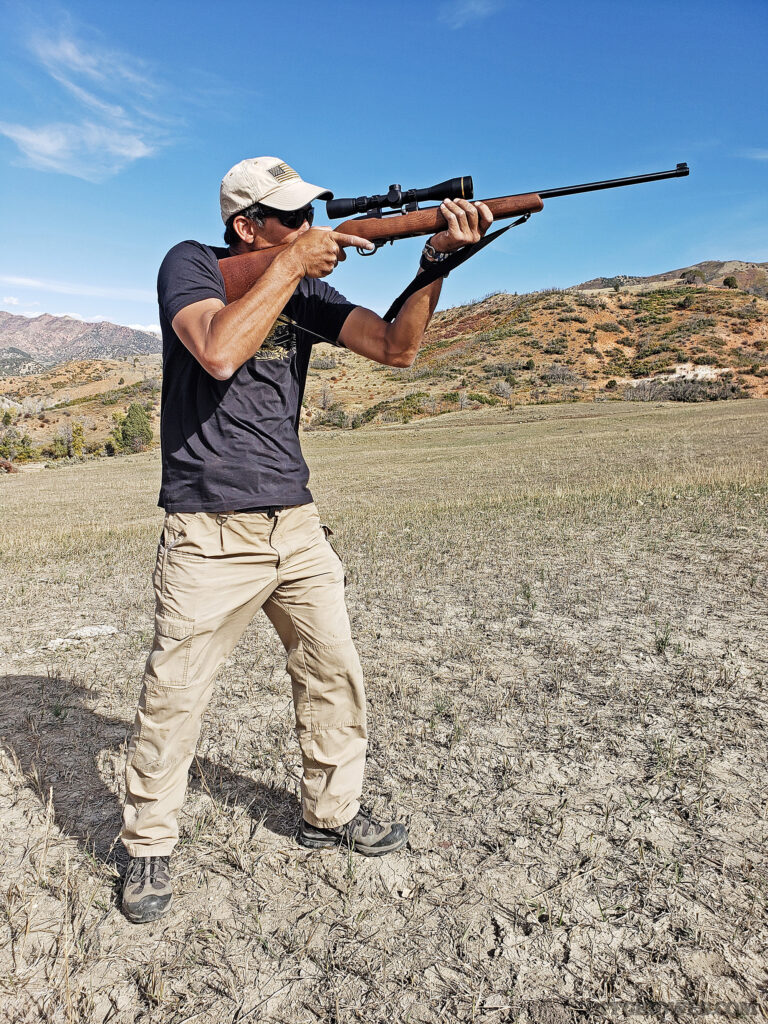
Above: Standing is the quickest position to get into but also the most unstable. It is most suitable for shorter distance shots or when less time is available for a firing solution.
Since Angier’s time, survival rifles have taken off in popularity with many companies offering take-down models, synthetic furniture, and accoutrements like M-LOK handguards, adjustable stocks, and removable muzzle devices. Firearm ownership has skyrocketed, and the meat shortage of the COVID pandemic left gun store racks empty with folks accepting the idea of hunting their own if supermarkets couldn’t provide. “Survival” became more broadly defined as not just wilderness, but urban and suburban as well.
Since the first publication of this book, there have been great advancements in how marksmanship is taught, not only for the woods but for the concrete jungle many of us live in. What remains the same are the fundamentals of marksmanship no matter how you use your rifle. Plinking is casual shooting, where it’s easy to blow through 100 rounds in a fun session, but survival shooting is anything but laid back. Each round matters, and how you train should set you up for success when your reality goes sideways. Events of the past few years means it’s worthwhile revisiting the survival rifle concept and, more importantly, the training that mimics reality. We selected a basic .22LR rifle, much like the type Angier recommended, and have highlighted some of the important positions to train and develop like your life depended on them — as someday it might.
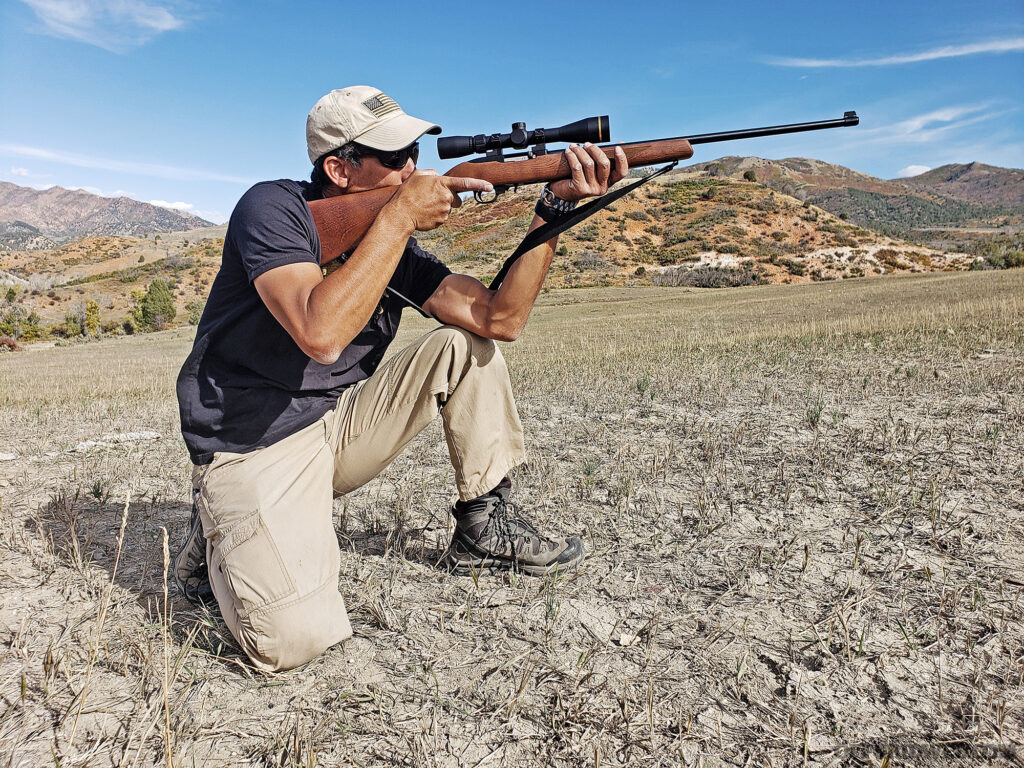
Above: A quick kneel (high or low) can greatly increase stability. The shooter should avoid bone-on-bone contact with the elbow and the knee.
The How and Why
In the early 20th century, the big three shooting positions were standing, kneeling, and prone. Shooting from the prone position offers great stability, but in the field this ideal is seldom presented as a reasonable option. More likely, shots will be taken by hasty kneeling, sitting, or standing with your rifle supported against a tree. You can practice with any firearm, getting into position and dry-firing, but running drills cold doesn’t provide any proof on paper. The jarring recoil of larger centerfire rifles may dissuade shooters from sustained practice from these unconventional shooting positions. The much friendlier .22 rifle helps the shooter make adjustments to their structure, determining if it holds up to pressure and if it results in hits on target.
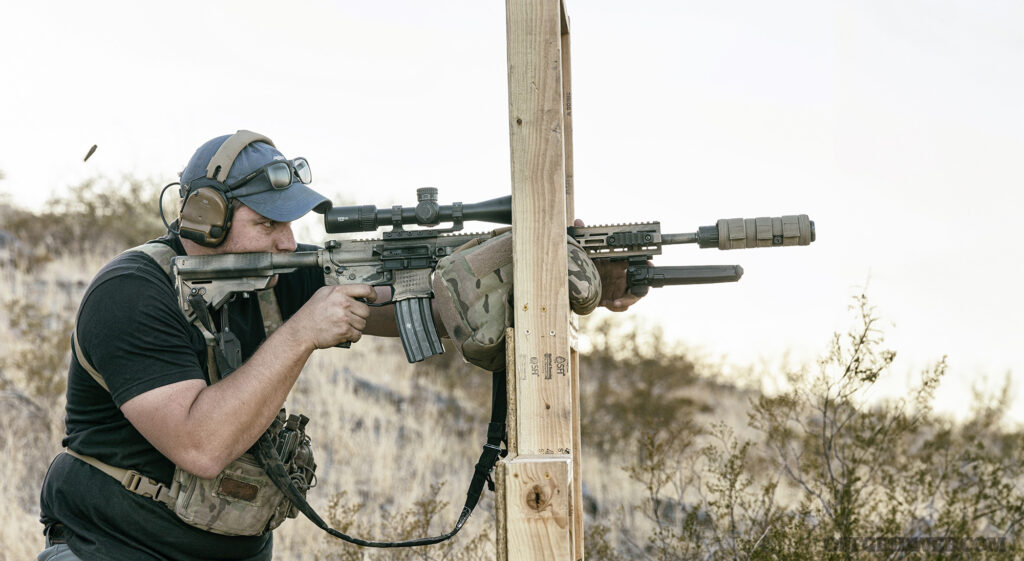
Above: Whether you're using an AR-15, bolt gun, or a .22LR varmint rifle, learning to work from a variety of positions can make you a more well-rounded shooter. This is especially important in a survival setting where every round counts.
Every shooting position presents a trade-off. Prone is stable but takes the greatest time to settle into. Standing is dynamic and allows easier reloading but is less stable. In a survival situation, variations of prone, seated, kneeling, standing, and support side shooting may be needed. Using available objects for increased stability, such as firing off of a backpack or resting the rifle forend on a tree branch, is a real possibility. Training should mimic these scenarios. Additionally, as you move from the most stable to the least stable positions, the size of the target should change to reflect the difficulty of the shot.
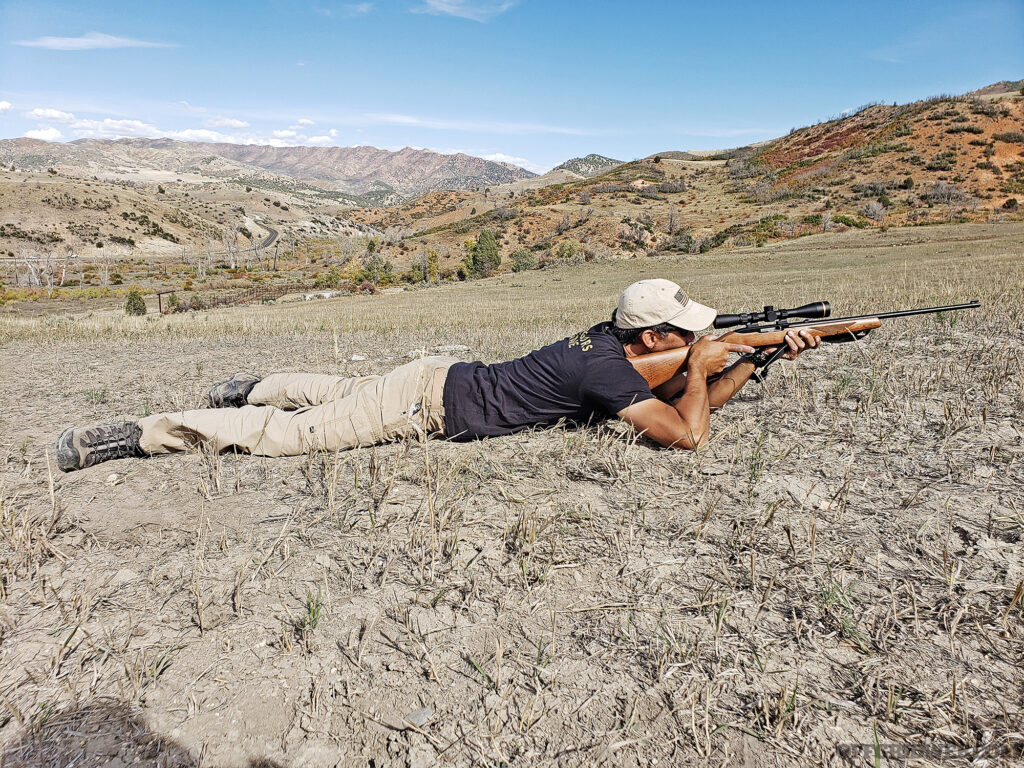
Above: Prone is the most stable position but it can be rendered useless in tall grass. Note the shooter’s flat heels and bone structure supporting the rifle
In this economy, perhaps the most compelling argument for training with a .22 is to save money. Material cost has skyrocketed, and the cost of ammunition has steadily risen in turn. The fundamentals of marksmanship can be learned with a rimfire rifle and then later applied to centerfire ammunition. While the diminutive .22 isn’t as capable as .223/5.56 or .30-caliber counterparts, the building blocks of good marksmanship can be applied to either round at closer distances and tracked on paper targets without the need to compare rimfire and centerfire ballistically.
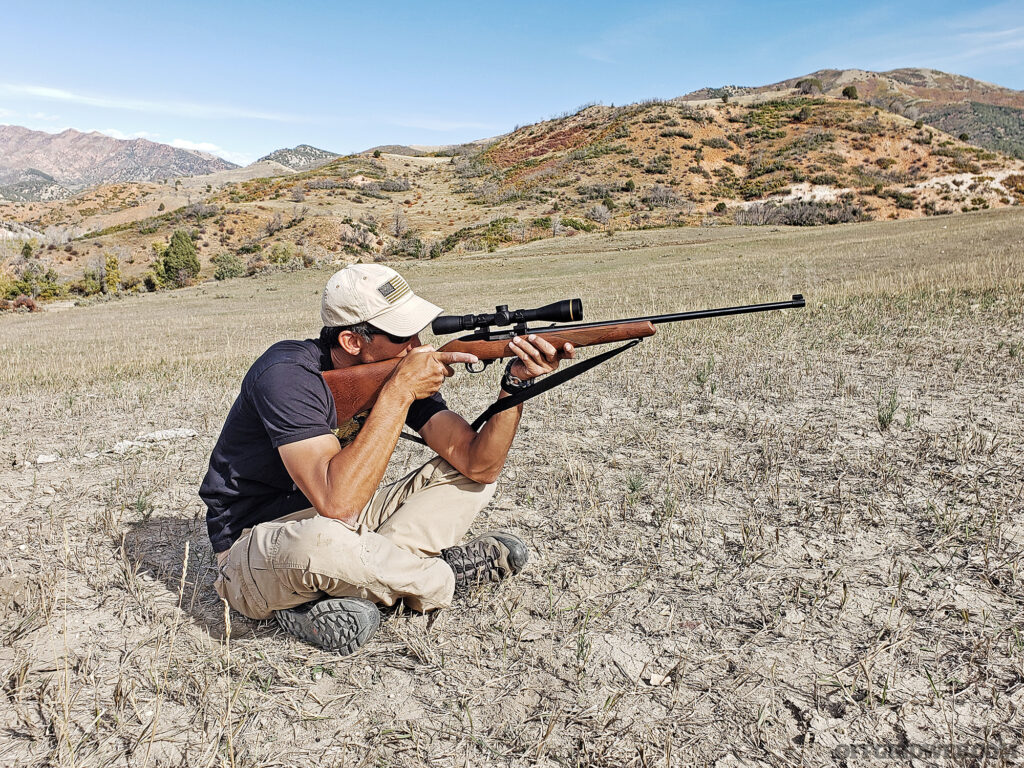
Above: Seated shots are accomplished with legs crossed or extended based on flexibility and comfort. Legs can also be extended if the terrain is not level.
8 Positions to Train
Standing: The standing position, sometimes called “offhand,” offers the fastest solution from a low-ready or high-ready posture. For instance, you may have to take a snapshot at an animal you come across while hiking along a trail. For a quick standing shot, find a repeatable touch point on the chest with the toe of the buttstock, and hold the rifle in position with the optic or sights coming in line with your eye. Standing is quick, but it lacks stability. It’s best used when there’s little time to set up or when your target is close enough. As the range increases, so should your ability to seek a better position for a more stable shot. Standing is optimized with the use of a sling wrapped around the upper arm. One of the benefits of standing is the ability to start walking or running to another location quickly.
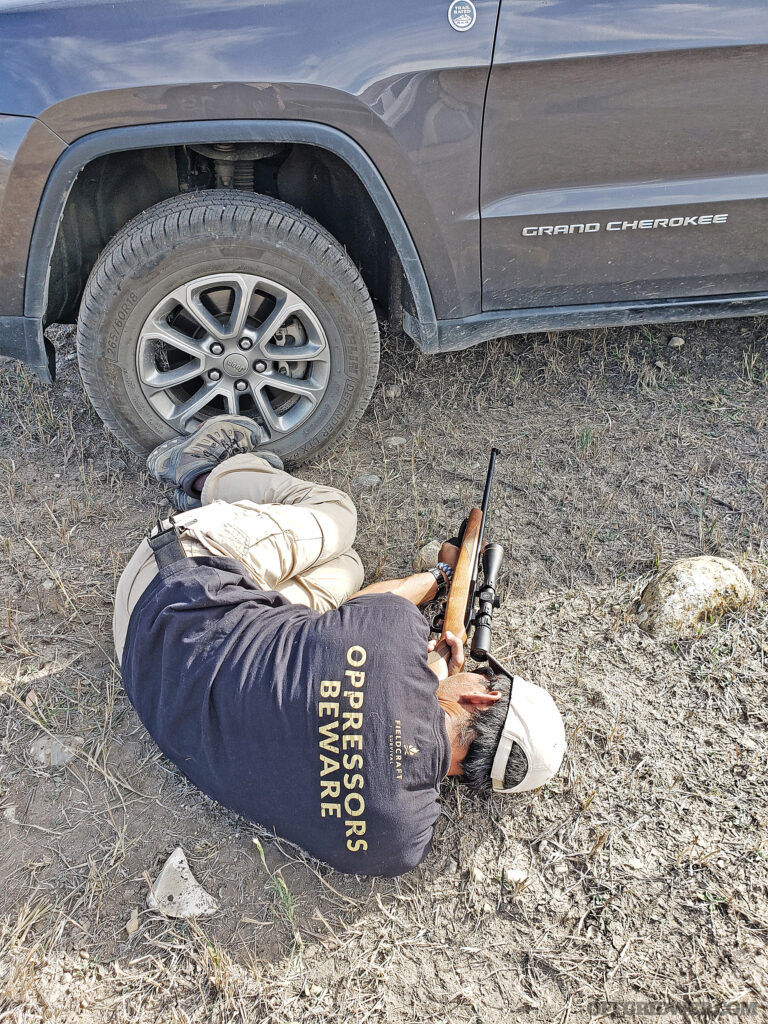
Above: Urban Prone (as pictured) uses the cover provided by a vehicle’s axle. The shooter can maintain stability by pushing off of the vehicle’s tire.
Kneeling: If there’s an opportunity to take a knee before a shot, it’ll increase your stability and reduce your profile. Kneeling can be done hastily with an upright posture, or compressed where you sit back on your heel. You can rest more of your shin flat against the ground for additional comfort. Kneeling is an excellent option to lower your level and silhouette. From a compressed kneeling position, place the outside of your support arm on the inside of your upright leg. Avoid bone-on-bone support between your elbow and kneecap. The duration a shooter can maintain a kneeling position will be determined by the substrate on the ground and fitness factors.
Prone: The prone position is the most stable of all the shooting positions, but it takes more time to establish. Prone uses the structure of your arm bones to support the weight of the rifle against the ground. The trade-off for greater stability is the time it takes to reposition if your sights need to move outside of the range of motion prone provides. Prone can also become uncomfortable in colder weather, as it places the body’s core against the ground where rapid conduction cooling takes place. If possible, a sleeping pad can be used as insulation if time permits to set up for a shot. Prone requires more time to work in and out of than kneeling or standing, but the level of accuracy improves dramatically with more points of contact against an immovable object that you’re resting on.
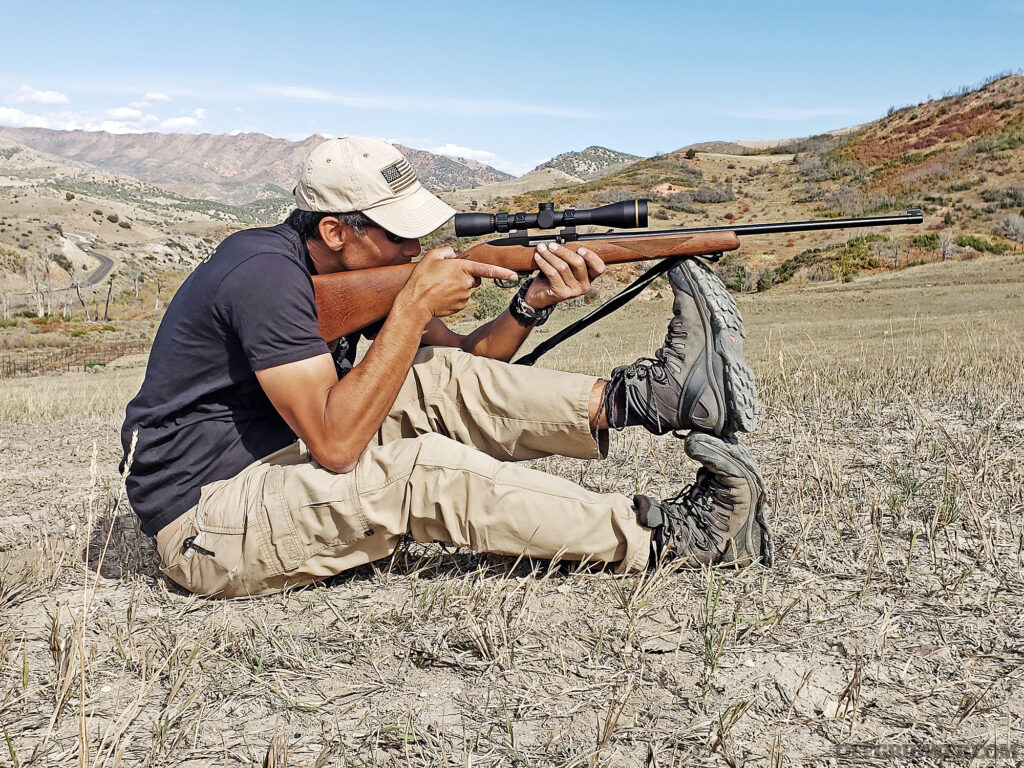
Above: Stacked feet looks ridiculous to some until they achieve hits with it. Much like barricade shooting, rest the forend and not the barrel to avoid point of impact shifts.
Squat/Crouch: Both squatting and crouching are quick to work into position and reduce your profile. Depending on your own flexibility, you’ll either be able to squat (range of motion will vary, with the greatest being able to sit on their feet) or crouch (similar to kneeling with one leg in front of the other without the knee touching the ground) to various lower levels. Squatting and crouching for some will be limited to bending over slightly at the waistline. Bending at the waistline requires core muscle input and creates muscle fatigue. As lactic acid builds up, your sight picture will become more unstable. Consider this option if you’re hunting in thick brush and dropping your level moves the muzzle below branches that obstruct your shot. A shot from the squat/crouch should be taken quickly before your body fights you. From the squat or the crouch, it’s easy to transition back to standing or lower yourself further into a kneeling or seated position.
Seated: The seated position takes time to establish but is second to prone in terms of stability. Seated can be with ankles crossed, legs crossed, or legs extended based on your comfort level and flexibility. Much like the kneeling position with the elbow of the support arm on the inside of the thigh, the strong side elbow is placed on the inside of the strong side high, creating a base. This reduces the amount of muscular input needed to hold the position, providing more durability. Just like the prone position, you place a large portion of your body on the potentially cold or wet ground, and a good sleeping pad or even a stadium seat can help improve your comfort for a long sit. The seated position can be used in tall grass that would otherwise obstruct the view from the prone position. Seated is moderately durable with repeated shots possible, but you must adjust your natural point of aim if working with a moving target outside the range of motion your seat provides.
Urban Prone: Think of urban prone (also called “Rollover prone”) like a modified sideways prone position. It’s accomplished from either side of the body based on your position relative to the cover and opening available. Urban prone can be done with knees and a shoulder on the ground or tucked to one side with legs compressed in to minimize your profile. While this position takes its name from the tactical world, where shots underneath vehicles, from behind the limited cover of a curbside, and through small firing ports are the only options, it could also be applied in a woodland environment where stacked downed trees provide concealment from your prey and limited options for a more traditional shooting posture. Urban prone is typically taught with AR-style rifles, but it can be used with traditional bolt guns as long as you have the same understanding of sight/bore offset and holds. In both urban and woodland settings, make sure to provide enough offset for your firearm’s moving parts if using a semi-auto weapon so the ground doesn’t cause malfunctions.
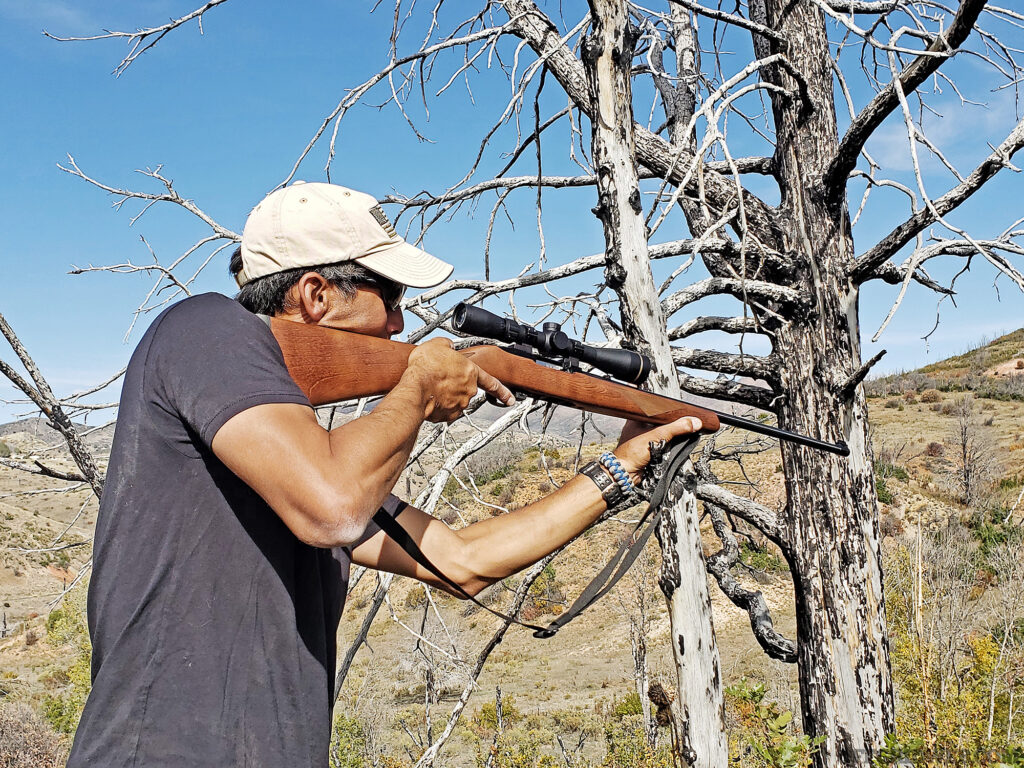
Above: A tree can be used to assist with an incredibly stable shot. If time allows, the sling can be undone and used as an additional support wrapped around the pole.
Tree/Post/Wall Assist: Bipods and tripods are excellent supports for your rifle, but they’re not always practical to install or carry. You can utilize rooted trees, posts, or walls as an alternative shooting aide. Use the support hand to brace against the tree, post, or wall, and hold the rifle in position with your thumb under the forend. You can also hold the front of the sling like a vertical foregrip to keep the rifle steady. This assist can be utilized standing, crouched, kneeling, or seated as well. Even a walking stick can be used as a makeshift monopod using this technique. It’s absolutely vital not to rest the barrel of the rifle against anything in the process of using a tree, post, or wall as an assist or in any of the other positions mentioned. Your barrel has unique harmonics that will be disrupted if it comes in contact with an object, and accuracy will suffer.
Stacked Feet: While this position looks awkward, results downrange justify its use. With legs extended and feet stacked on top of one another, you can bring the height of your muzzle above other conventional seated positions by placing the forend of the rifle on the top of your boot. This position works well for heavy barreled rifles that tax the body more than slimmer profiled barrels. Stacking your feet requires some balance but once you get the hang of it, it works well for longer distance shots. The trade-off is mobility and limited range of movement. Since the position requires flexibility and balance, it’s also not a good position for sustained use. If you happen to have the assistance of a training partner, they can place their knee/shin against your back to allow you to lean back against it and achieve greater stability. If no partner is available, you can lean your back against a rock, tree, or hillside.
Modifiers
With all of these positions, there are ways to modify your training to adjust the difficulty level and performance expectations. Just like the flat range doesn’t always translate over to real life self-defense events, you must go beyond the basics to fall back on in a survival scenario. Keep in mind that you won’t rise to the occasion, you’ll fall back on your level of training. It’s better to train with increased difficulty to make a difficult situation you actually face later less imposing. It’s easy to incorporate some training modifiers that provide a greater difficulty level for newbie to experienced shooters.
Time is universal in all shooting positions. There’s an amount of time needed to get into position, an interval of time between shots, and a total amount of time from start to finish. You can track your time with a shot timer, or a training partner can use their smartphone to record you. If you have the space and backstops are plentiful, you can do a woods walk with a training partner with targets staged in various places. You don’t have to let your training partner know when to be prepared to take a shot; just tell them to locate and engage the target hidden in the woods, much like an animal would be. After all, the animals you’re training to hunt in an emergency don’t live their lives tacked to a target backer at a set distance down range.
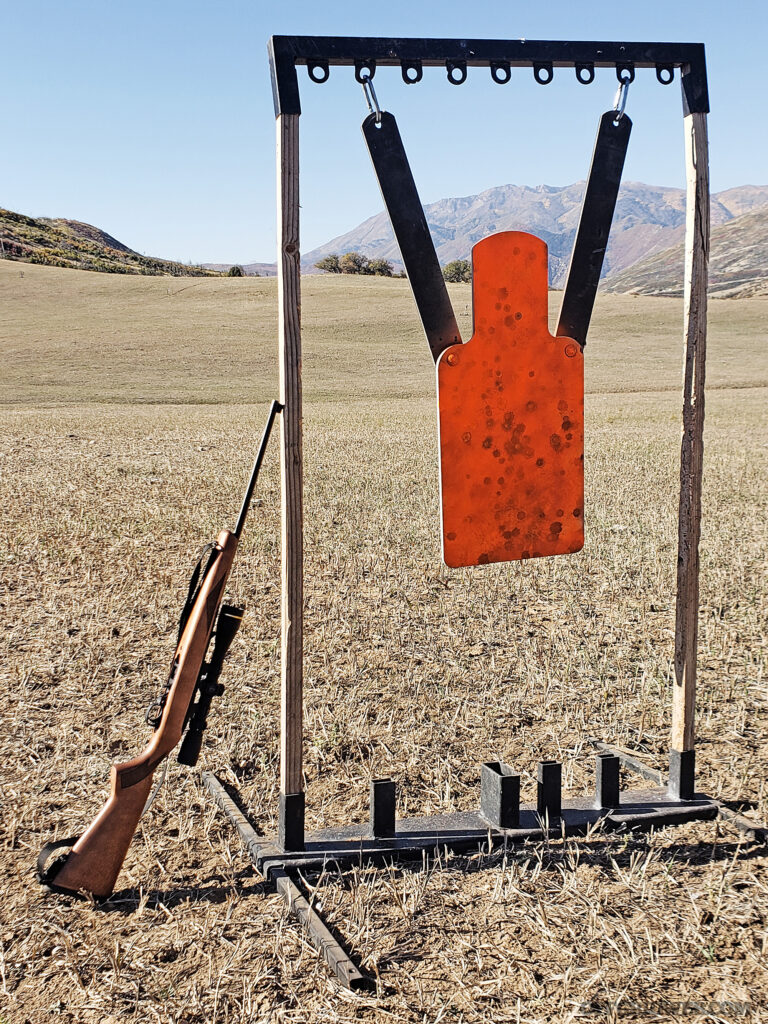
Above: The author’s Ruger 10/22 with Leupold 3-9 Rimfire optic in Talley Rings used for this article in the mountains of Spanish Fork, Utah.
Another element that can be modified is the distance to your target. The vital area of the game you’re hunting won’t change in size, but the way it appears to your naked eye (unless you adjust a scope) will change as the range increases. You must understand how your round travels once it leaves the barrel, compared to your line of sight. Many animals that are easy to hunt may travel in groups, so follow-up shots may be needed once the first animal is dropped. You can pair training far shots with near shots in your training evolution, or you can test yourself with far and farther shots too.
Yet another modifier is a strict standard for accuracy. You can use coins, bottle caps, or any other metric as a maximum allowed group all of your rounds must fall inside of for a particular shooting position. Eventually, you can jump to heavier calibers, which is the whole point of using your rimfire. The increased recoil, more pronounced muzzle report, and disturbance to your natural point of aim will affect your performance. However, if you adhere to the fundamentals and spend enough time working with a rimfire, the transition to centerfire shouldn’t be too much of a leap. The hard part is learning the macro aspects of positional shooting, which you can accomplish with a micro-caliber rifle.
Bilateral rifle shooting may also be needed in a survival scenario. You may be pursuing a particularly spookish animal and shooting from your strong side would expose you and cause the animal to flee. Working your support side may be the only option. Additionally, if you’re in a survival scenario, you may have sustained injuries including your eyes. Learning to use your non-dominant eye and side will help you prepare for that scenario. If nothing else, bilateral shooting helps you work through the fundamentals, as you may have to relearn the basics to put rounds on target down range.
Read More
Subscribe to Recoil Offgrid's free newsletter for more content like this.
Editor's Note: This article has been modified from its original print version for the web.
The post Survival Rifles: Positional Rifle Shooting appeared first on RECOIL OFFGRID.
By: Patrick Diedrich
Title: Survival Rifles: Positional Rifle Shooting
Sourced From: www.offgridweb.com/preparation/survival-rifles-positional-rifle-shooting/
Published Date: Mon, 11 Mar 2024 11:00:50 +0000
------------------------
Did you miss our previous article...
https://bushcrafttips.com/bushcraft-news/9-ham-radio-antenna-types-that-will-work
 What is BushcraftSurvival SkillsToolsVideosBushcraft CampsBushcraft KitsBushcraft ProjectsPrivacy PolicyTerms And Conditions
