When you think about lung damage, you might think about pneumonia, but not all damage to the lungs and chest is related to inflammation due to infections. Trauma is also a possibility, especially for those of us who venture off the grid for activities such as hunting, hiking, or mountain biking. In austere settings, a family medic may have to deal with injuries that can sometimes be lethal without immediate intervention. Penetrating chest wounds often fall into this category.
WARNING: Although the steps to performing needle decompression and chest tubes are explained in this article, be aware that these procedures are not always successful, even in the hands of trained medical personnel. If performed incorrectly, they can cause severe injury or death, and certain states do not waive liability for complications under “Good Samaritan” laws. Always stay within your level of training and seek professional medical help as soon as possible.
First, some anatomy: The lungs are protected by the rib cage. Humans have 12 pairs of ribs, numbered from top to bottom. These are sometimes called “true ribs,” “false ribs,” and “floating ribs.” The true ribs (ribs 1 to 7) connect to the sternum (breastbone) via flexible connective tissue called cartilage. The false ribs (8 to 10) connect not to the sternum itself, but to the cartilage of the 7th rib instead. The 11th and 12th ribs “float” in front, with no connection to the breastbone at all. All ribs, however, connect to the spine in back. Ribs are also connected to each other by muscles (called intercostal muscles). Nerves and blood vessels travel just under each rib in the intercostal space.
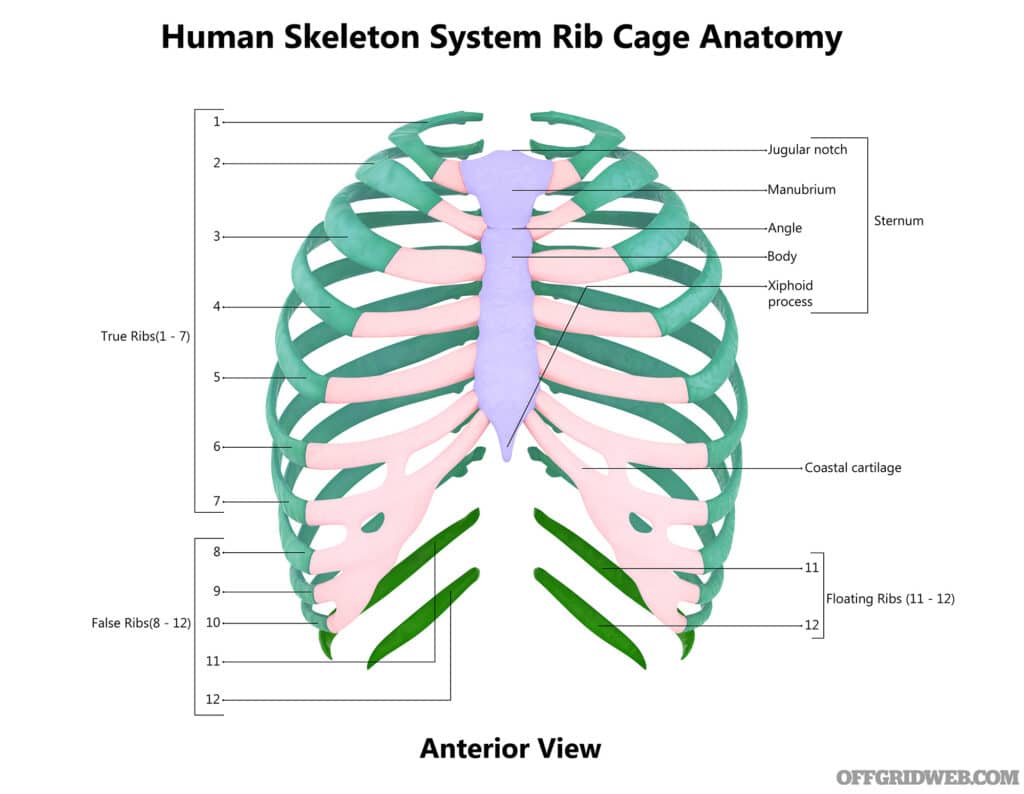
Above: An illustration of the human rib cage.
Rib Fractures
Once significant trauma impacts the rib cage, fractures may occur. Rib fractures most often involve the middle ribs. If a rib is broken, you may note the following:
- Pain, sometimes with a palpable bump or dent at the site of impact
- Increased discomfort with breathing or movement
- Bruising of the chest or back
- Grating sensations or sounds when fractured bone ends rub against each other (use a stethoscope over the area to listen)
- “Splinting,” the tensing of muscles in an effort to decrease pain while breathing
In uncomplicated single fractures, there’s often no change in the appearance of the chest wall itself. Previously, these injuries were treated with a binder or by tightly taping around the entire chest. Although these methods relieved some discomfort, they’re now thought to cause more harm than good by preventing the ability to take deep breaths. Failure to fully inflate the lungs can lead to pneumonia. Instead of completely encircling the chest, tape could be placed on the front over the injured rib and ending at the middle of the spine in the back.
Above: Simple rib fractures may heal with little intervention, but more severe fractures can puncture the lungs.
You can prevent pneumonia due to “under-breathing” by encouraging slow deep-breathing exercises and gentle coughing every two hours or so. Your patient will experience less pain during this process by holding a blanket or pillow against the site of injury. Some practitioners, instead, place the arm on the affected side in a sling with padding between the arm and ribs for support during breathing exercises. Full recovery will take six to eight weeks.
Ibuprofen and cold packs are helpful for pain. Interestingly, many rib fracture patients sleep more peacefully lying on the injured side.
More serious or multiple fractures may present with:
- Rapid, shallow breathing
- Rapid heart rate
- Bloody cough (hemoptysis)
- Markedly irregular appearance (bump or dent) at the site of injury
- Decreased or unusual movement of the chest wall on the affected side
The signs above may indicate injury to the lungs or other structures in the chest.
When there are multiple rib fractures, they usually occur in a row. This injury is called a Flail Chest and can be identified by placing one hand on each side of the chest. Observe chest movement during breathing. The uninjured side will rise during inhalation as normal, but the flail injury side will fall. This occurs because the loose rib segments “float” and are pulled into the chest cavity when inhaling. The lung is usually bruised (at best) and gets less oxygen to the body. Without modern respiratory support and, perhaps, surgical intervention, the patient is unlikely to survive.
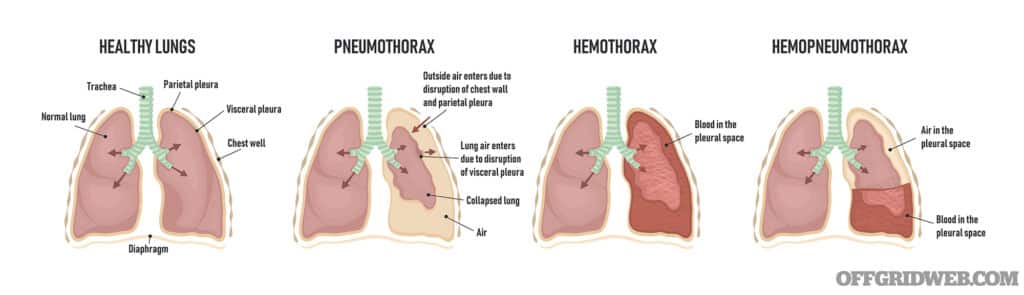
Above: A lung can collapse due to the pleural space filling with air, blood, or a combination of both.
Pneumothorax
Rib fractures are most dangerous if a bone fragment punctures organs in the chest, such as the lungs. Air enters the chest cavity through the lung puncture, causing a condition known as a pneumothorax. As more air fills the chest, it causes pressure that makes it difficult for the lung to inflate with air. The lung collapses under the increased pressure.
If blood is filling the chest cavity, it’s called a hemothorax. Hemothorax is characterized by a dull sound on tapping (percussion), while air in the chest cavity sounds more like a drum. If it’s dulled at the bottom and drum-like at the top of the lung, it’s a combination of the two (hemopneumothorax).
Although a person with a very small pneumothorax will complain of pain with breathing or some shortness of breath, the condition may sometimes resolve on its own or with supplemental oxygen. It may, however, progress to a tension pneumothorax.
In tension pneumothorax, a large air collection in the pleural space compromises breathing and heart function. It can occur as a result of trauma from an open chest wound, like a stab wound or a gunshot. It can also occur in closed trauma, like a rib fracture.
The victim may present with signs of bluish skin coloration (cyanosis), distended neck veins, rapid breathing, and an elevated heart rate. The victim may go into shock. If you use a stethoscope, you’ll hear crackling sounds or, sometimes, no breath sounds at all on the affected side.
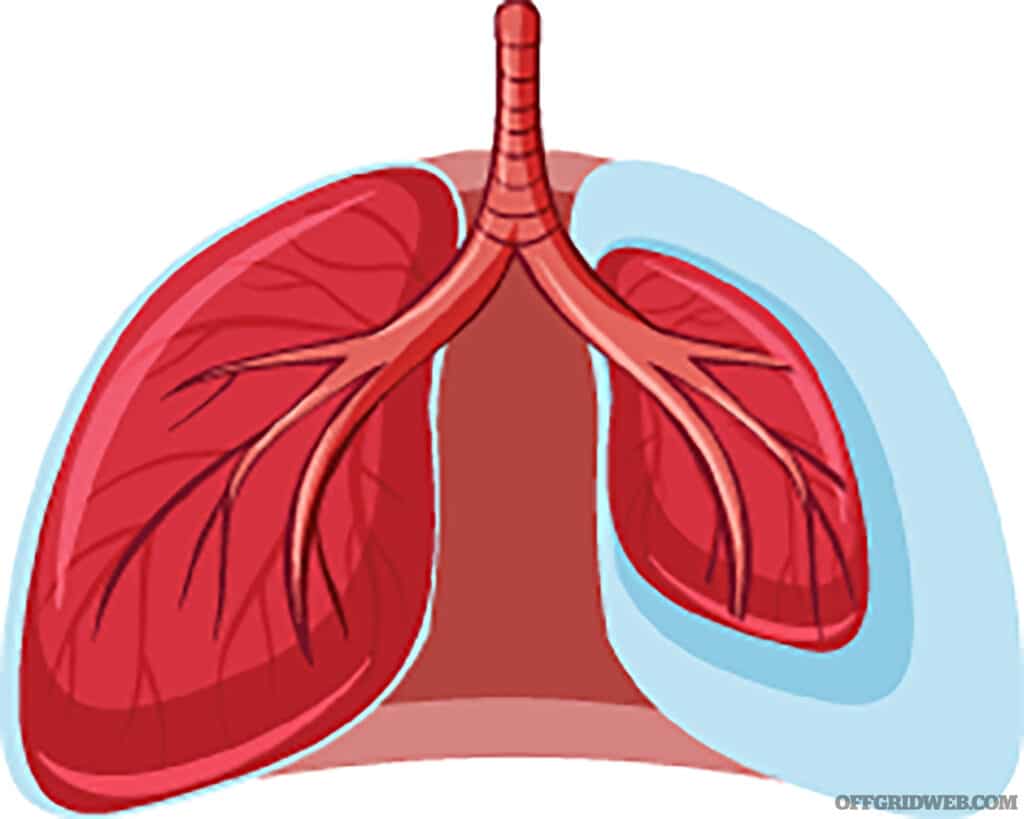
Above: If air enters the chest cavity and causes the lung to collapse, this is known as a pneumothorax
Needle Decompression
With a tension pneumothorax from a rib fracture, emergency needle decompression is indicated if there isn’t an open wound. Needle decompression carries significant risks and can be fatal if performed incorrectly. It should only be attempted in austere settings if it’s clear the patient will die without action taken on their behalf.
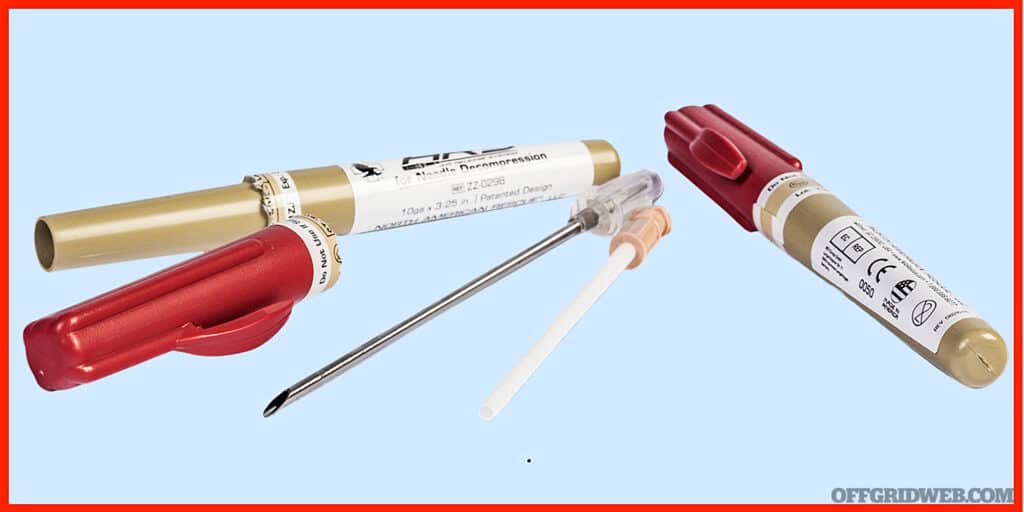
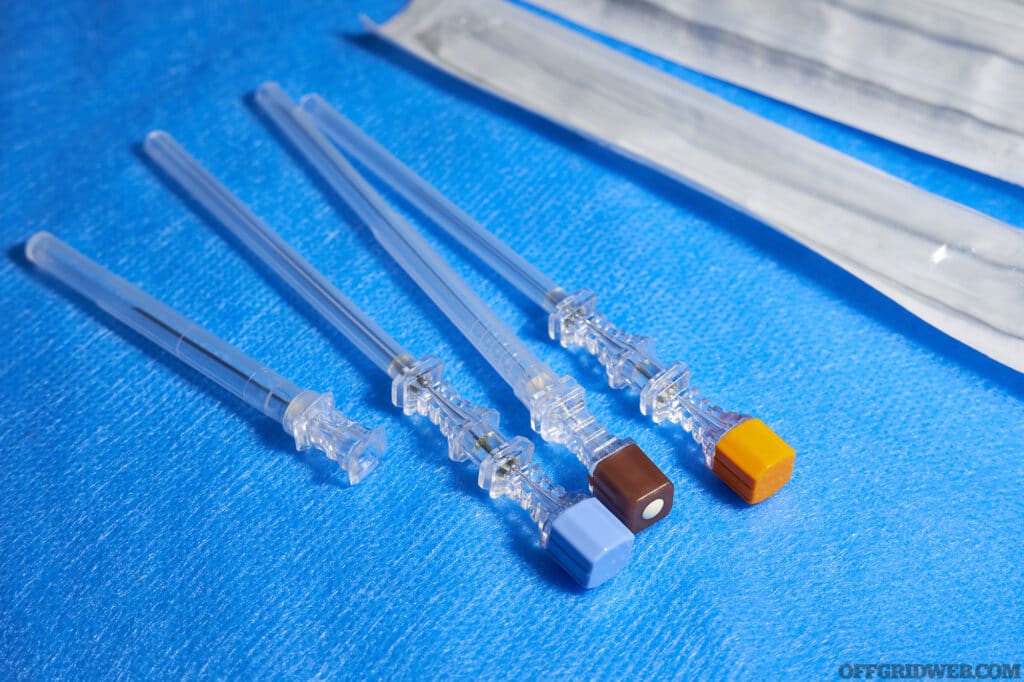
Above: Some individual first aid kits (IFAKs) or trauma kits include a decompression needle, but it’s critical that you understand the risks and have been trained in the proper technique before attempting to use one.
To perform needle decompression:
- Wearing gloves, clean the area of the chest on the affected side with Povidone-iodine solution (betadine) or Chlorhexidine (Hibiclens). Your target is the intercostal space just above the third rib midway between the center of the collarbone and the nipple. On the left side, be sure to stay to the outside of the nipple line and not pointed toward the heart (left side). An alternative would be the fourth or fifth intercostal space at a line straight down from the front of the armpit (anterior axillary line). A product called Thorasite is meant to pinpoint this area clearly.
- Using a 10-14-gauge 3.25-inch decompression needle catheter, enter the skin just above the rib at a 90-
degree angle to the chest wall. This will avoid blood vessels and nerves, which travel just below the rib.
- Listen for a pop and a hiss as air passes through. This should decrease the pressure in the chest cavity and allow the lung to inflate.
- Remove the metal needle and secure the remaining plastic sleeve (the “catheter”) in place with tape.
- Many are taught to place a valve of some sort over the catheter once placed. This is meant to prevent air from returning to the lung cavity. Some needles may have a stopcock for this purpose. Otherwise, an item known as a “vented chest seal” may be used as a covering.
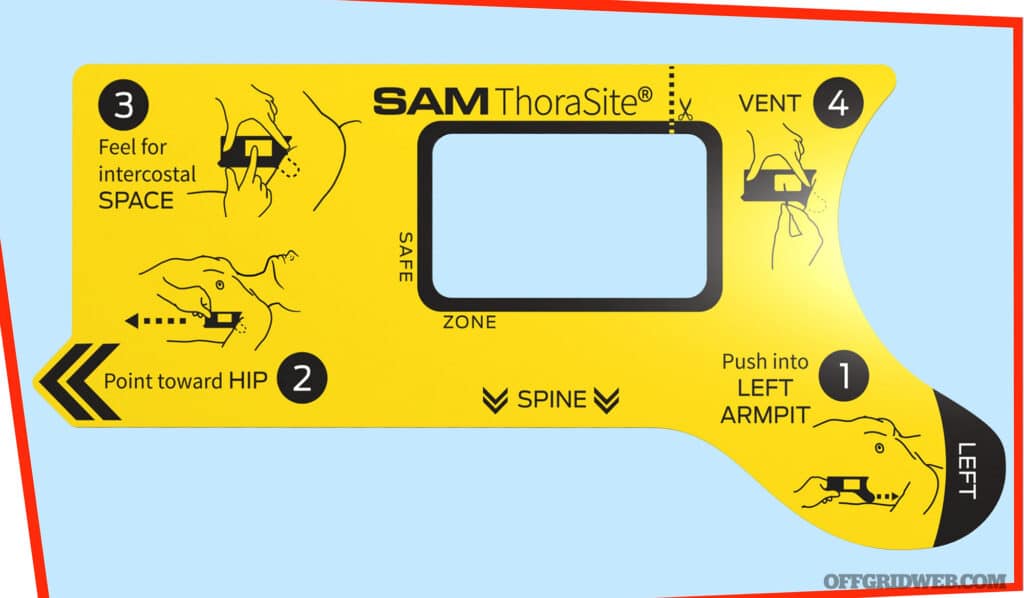
Above: The SAM Thorasite serves as a guide for decompression needle placement.
Chest Seals
Chest seals are useful items for medical storage. Asherman, Hyfin, Bolin, or other vented chest seals are effective in helping secure the catheter in place in a closed pneumothorax.
When penetrating trauma like a stab or gunshot collapses a lung, it’s termed an “open pneumothorax” or a “sucking chest wound.” In order for a lung to reinflate, a chest seal must be placed over the site of entrance wounds (and exit, if any). Your goal is to provide a way for the air to escape from the chest cavity wound, but not to go back in.
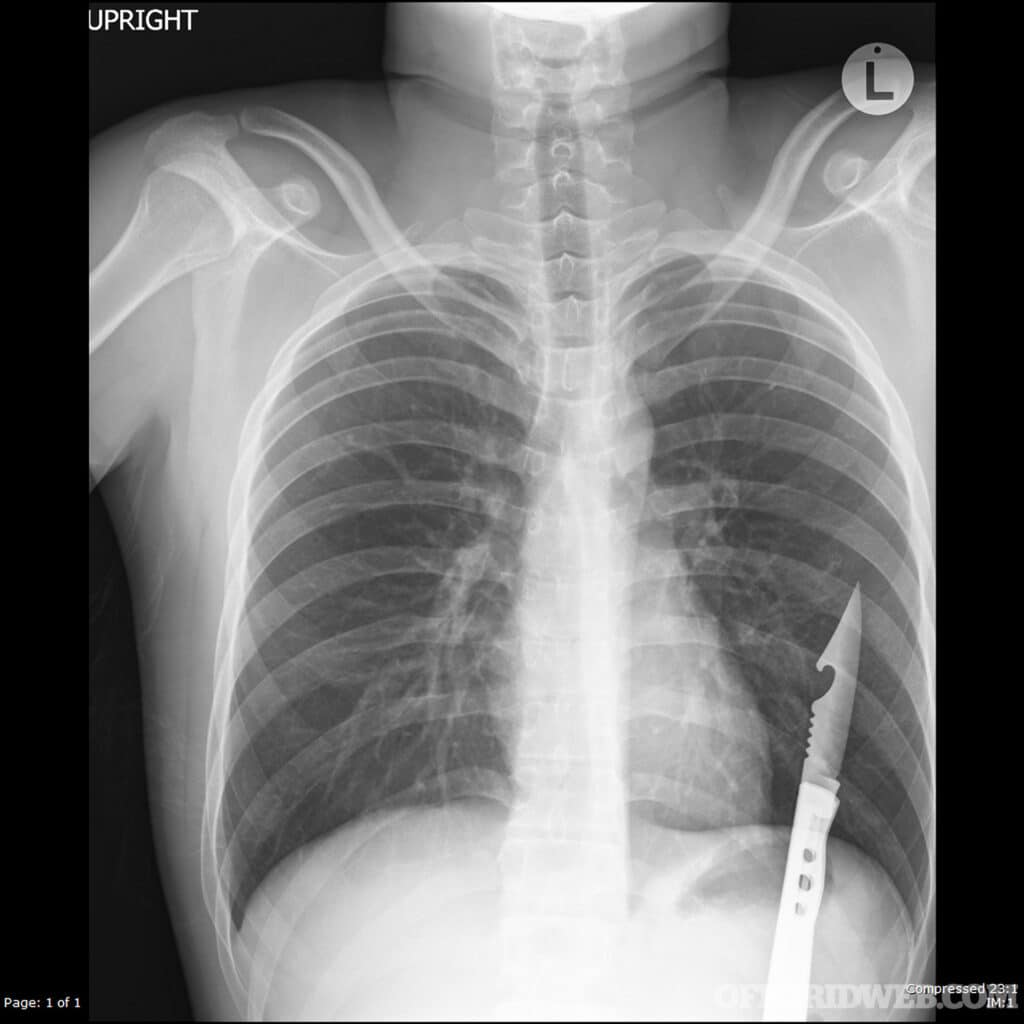
Above: Chest X-ray of a stab wound with knife in place. If an object has impaled the chest, it’s generally advisable to leave it there until the patient reaches a hospital. Removing it may make the situation much worse.
To apply a chest seal:
- Position the victim so that breathing is easiest.
- Wipe all edges of the entry wound clean with dry gauze.
- Wait for the patient to exhale and apply the seal without touching the inside adhesive surface.
- Repeat this process for exit wounds as well.
The desired effect of a properly placed chest seal is to decrease the pressure in the lung cavity that’s preventing the lung from inflating. Your patient should start to breathe easier.
Although many commercial vented seals are available, one can be improvised by taking a 4- to 6-inch square of plastic wrap or other airtight material and firmly taping over the top and sides of the wound. The open bottom edge will serve as a valve and allow air (and perhaps, blood) to escape and the lung to inflate, while not letting air back in. Do not seal all four sides. If this fails, it may be because air cannot exit. In this case, the wound opening could be spread slightly to allow air to exit; then, replace the seal.
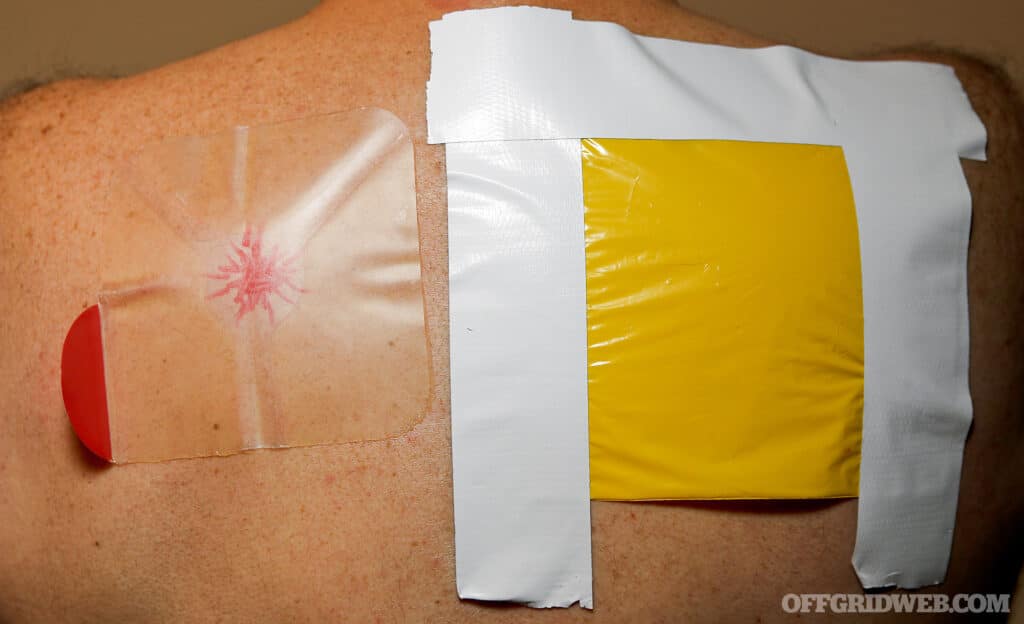
Above: Sealing a chest wound requires a valve or a side to be open so that air can enter and fluids can drain. Hyfin vented chest seal (left) and an improvised chest seal (right)
Chest Tubes
A successful needle decompression or chest seal placement is only the start in a wound that collapses a lung. There’s much more to be done, such as placing a chest tube. This is an extensive procedure that opens a path for drainage of fluids and re-inflation of the lung. Inflammatory or bloody fluid is likely to accumulate in many lung wounds and must be eliminated to allow adequate air passage. A chest tube will help.
Most commonly, a suction system powered by electricity is used for a major wound. If no help is coming, however, a chest tube of sorts, using gravity, can be improvised in dire off-the-grid circumstances.
A length of plastic tubing (not too soft) with several holes cut in the sides will be a good material to use for the tube itself. It doesn’t have to be very large. 38 French is a typical size for an adult (French size is a measure of the outer diameter of the tubing). 38 French is about half an inch, but somewhat larger sizes can be used if available, especially in the case of a hemothorax.
Above: Once inserted, remove the metal decompression needle and leave the plastic catheter.
Locate the fifth intercostal space at the mid-axillary line (straight down from the middle of the armpit). The incision should be made higher in women in advanced pregnancy. It must be above the level of the diaphragm.
If local anesthesia is available, this is a good time to use it. Put on sterile gloves and make a small incision with a scalpel through the intercostal muscle. This should be big enough to accommodate the tube and penetrate all the way into the space between the inside chest wall and the lung. A hiss may be noted when it enters the chest cavity. Stretch the incision with a Kelly clamp and then your finger to make space for the tube.
Placing the tip on the clamp on the forward end of the tube, deposit the tubing into the lung space. Using the clamp, insert it further in until all the drainage holes are inside the pleural space. Place a silk suture to secure the tube so it doesn’t fall out. There should be no fluid or air leakage from the incision itself. Cover with a sterile dressing.
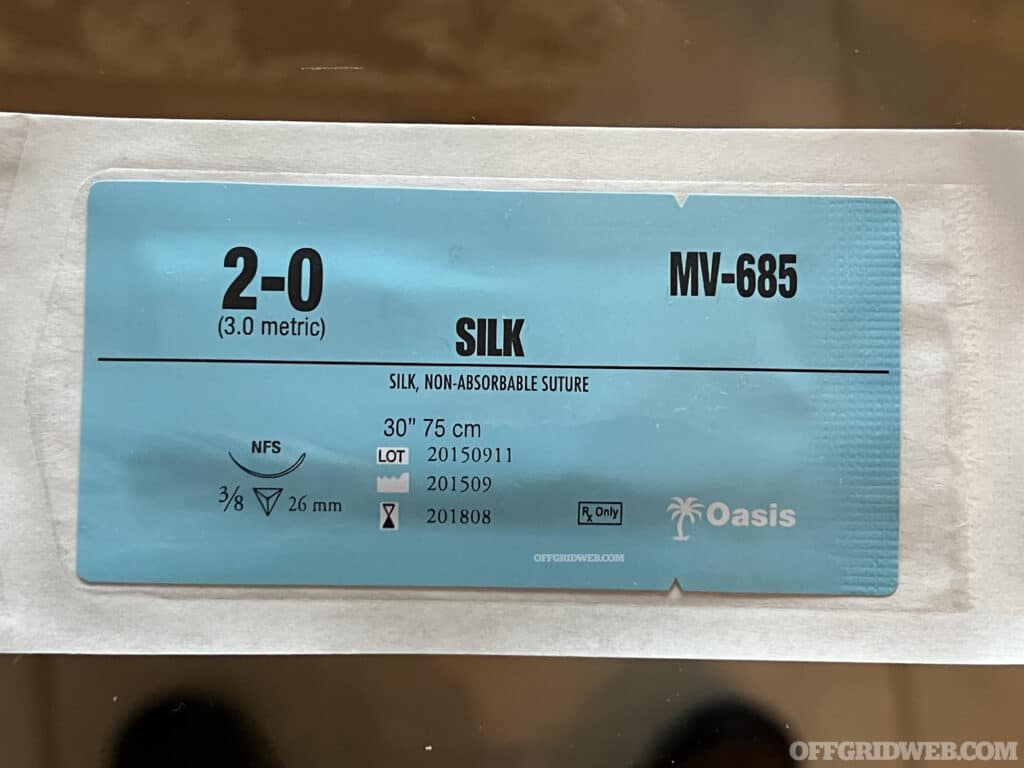
Above: Once a chest tube is inserted, secure it in place with a nonabsorbable suture.
Ongoing Care and Complications
Now that the chest tube has been placed, you need a drainage collecting system. Two bottles with tops and some more tubing can be used as materials. Make two holes in the top of each bottle that match the size of the tubing. The end of the tube that’s in the lung space is placed in one of the openings in the first bottle. Here’s where blood and air will collect.
Place one end of some extra tubing in the second opening of the first bottle and insert the other end into a hole in the second bottle. This bottle should contain about 20 centimeters of sterile water. The tubing is placed so that the end is 2 centimeters below the water level. This prevents air from entering the lung space.
Once the tubing is properly secured and leak-free, air from the lung space goes into the first bottle and travels to the second bottle. It’ll appear as bubbles coming from the underwater end of the tube (more noticeable when the patient coughs). The air then exits through the second hole in the second bottle. If the chest tube is clear, the water will rise slightly with inhalation and fall with exhalation. As water evaporates, it’s important to check and maintain the water level in the bottle.
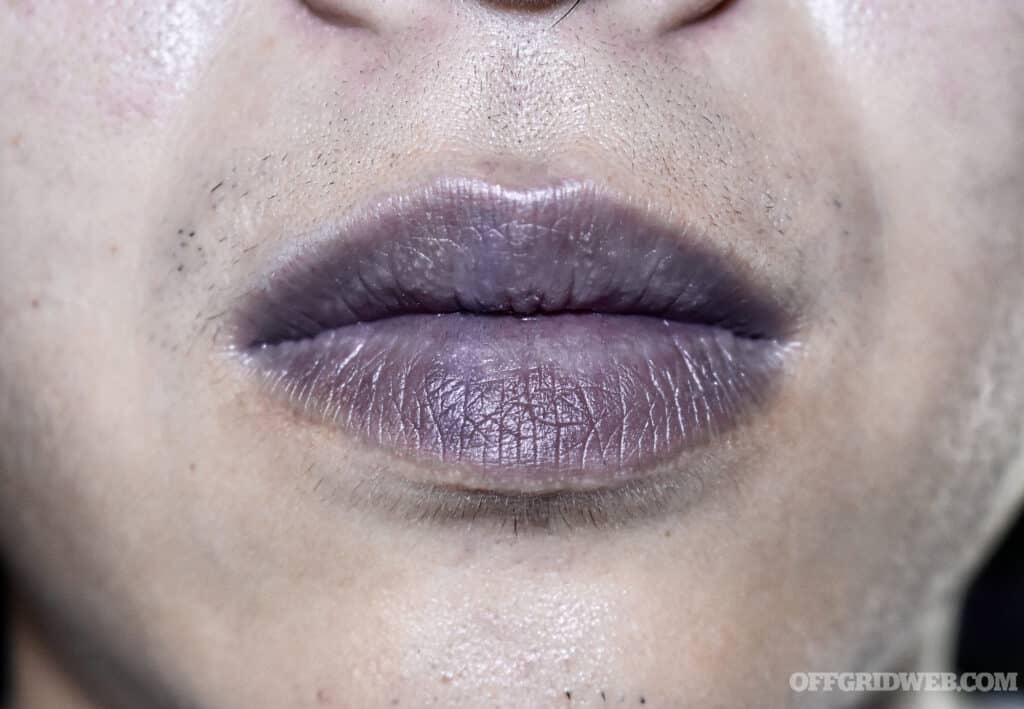
Above: Pneumothorax patients may present with cyanosis, bluish skin coloration due to a shortage of oxygen in the blood.
The victim is placed on the side that the chest tube was placed so gravity helps with drainage. The bottles are placed below the level of the patient. Tubing should be checked regularly for kinks. Some suggest having the patient blow into a balloon or a nitrile glove to help force fluid and air out of the chest cavity during healing. Be aware that this will be painful. At the very least, have the patient perform deep breathing and coughing exercises.
As blood accumulates in the first bottle, it’ll likely need discarding from time to time. The tube should be removed when the patient is stable, drainage is minimal (100ml per day or so), and no air bubbles are noted.
Complications with this system, even in modern times, aren’t uncommon. If, for some reason, the chest tube falls out of the chest, immediately apply pressure to the insertion site after having the patient exhale fully. Disconnection of the tube further out in the drainage system requires clamping the tube and immediately placing the disconnected ends in sterile water. Clean the loose ends with alcohol and reconnect.
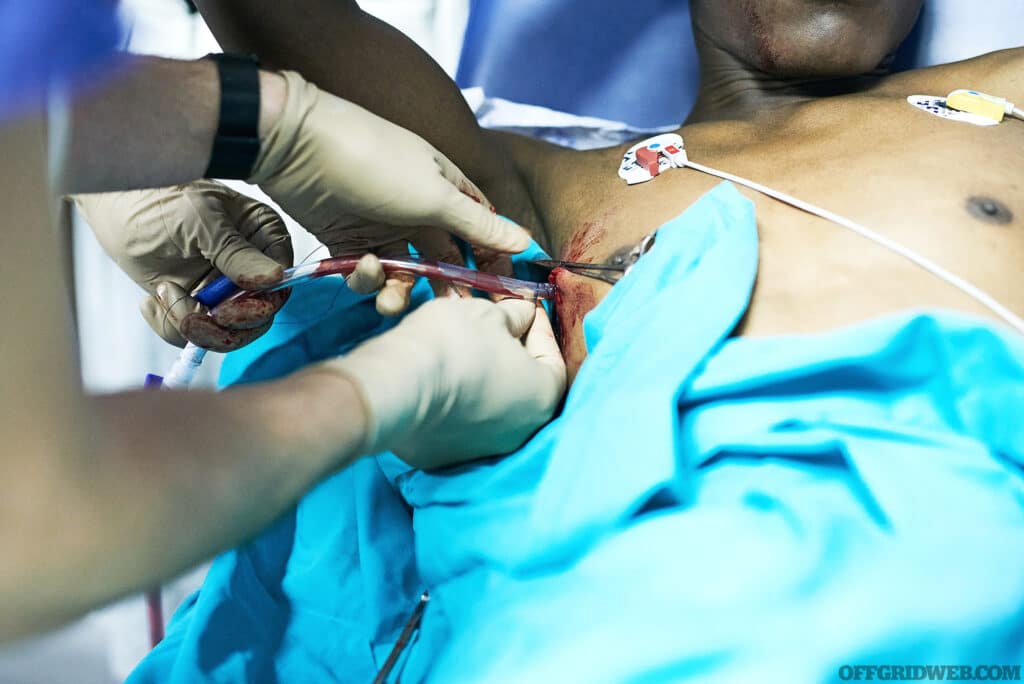
Above: Doctors placing a chest tube in an emergency room.
It’s not rare for blood clots to clog chest tubes. Avoid stripping or “milking.” Suctioning the tube with a large syringe may be a low-tech solution to clear the system. If this doesn’t work, the tube may require removal and reinsertion. If constant bubbling in the system is noted, there may be an air leak somewhere in the system.
To remove, have a dressing ready with a good amount of petroleum jelly on it. Cut the suture that is holding the tube in place and have the patient hold their breath and bear down. As soon as they comply, pull the tube out quickly and place the dressing on right away. Secure in place. There may be some splatter (and, oh, it hurts).
The above method is a reasonable option in austere settings, but, honestly, no improvised system will be as efficient and sterile as the suction systems and respiratory support available in modern medical facilities.
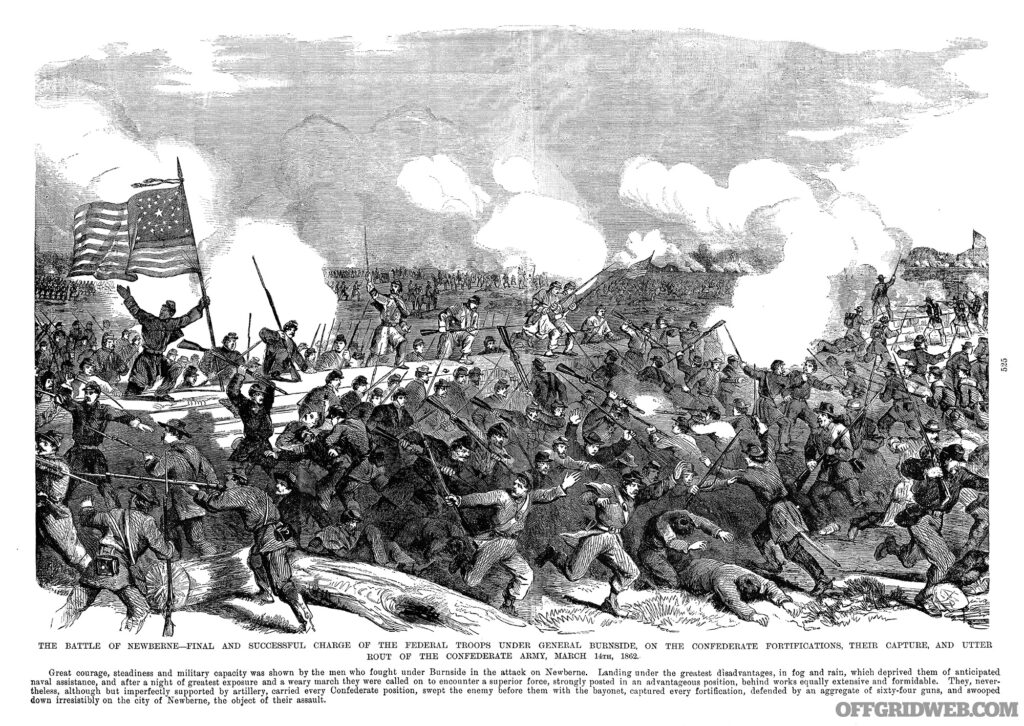
Above: During the American Civil War, chest trauma carried a staggering 72 percent death rate.
Reality Check
It’s important to accept that a traumatic pneumothorax will be difficult to survive. During the Civil War, chest wounds carried a 72 percent death rate. We’ve come a long way since then, but the chances of a failed procedure or complication are very high when you’re working outdoors in austere conditions with less-than-ideal equipment. Be realistic in your expectations, and always try to call for help before attempting any potentially life-threatening medical procedure on your own.
About the Author
Joe Alton, MD, FACOG, FACS, is an actively licensed physician, medical preparedness advocate, and the New York Times bestselling author of several award-winning books, including The Survival Medicine Handbook: The Essential Guide For When Help Is NOT On The Way, now in its fourth edition. He designs an entire line of medical kits for the serious off-grid medic; find them at www.doomandbloom.net
Read More
Subscribe to Recoil Offgrid's free newsletter for more content like this.
Editor's Note: This article has been modified from its original print version for the web
The post How to Treat Penetrating Chest Wounds appeared first on RECOIL OFFGRID.
By: Patrick Diedrich
Title: How to Treat Penetrating Chest Wounds
Sourced From: www.offgridweb.com/survival/how-to-treat-penetrating-chest-wounds/
Published Date: Tue, 20 Aug 2024 17:00:19 +0000
------------------------
Did you miss our previous article...
https://bushcrafttips.com/bushcraft-news/pros-and-cons-of-optic-devices
 What is BushcraftSurvival SkillsToolsVideosBushcraft CampsBushcraft KitsBushcraft ProjectsPrivacy PolicyTerms And Conditions