If you’re out on your own, you’ll need to keep warm in the wilderness and be able to cook and boil water for drinking. Fires need to be closely monitored and kept under control, but sometimes that control is difficult to maintain.
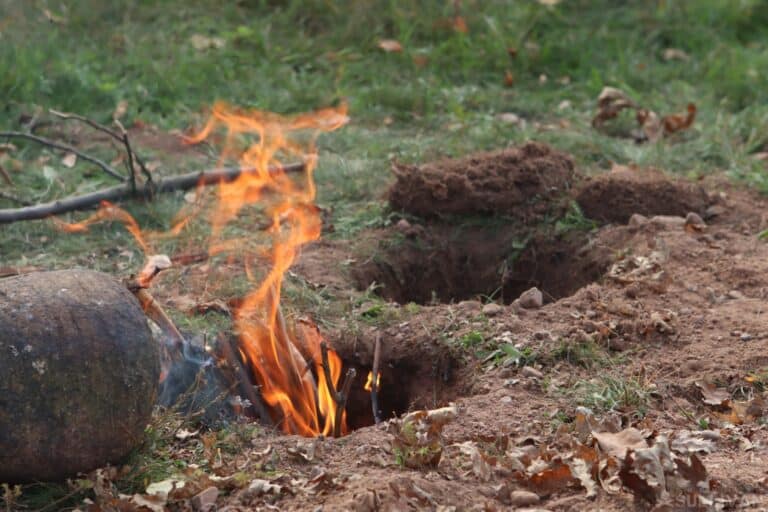
The wind either blows your fire out or puts it into the bush and then you have a bigger problem.
This is something that the Native American tribes of the Dakotas understood very well, and they came up with an ingenious solution, the fire hole.
So, what is a Dakota fire hole, how does it work, and how do you make one?
The History of the Dakota Fire Pit
The Dakota fire hole is an ancient technique. Back in the day, the Native American tribes were very nomadic. They were constantly on the move – following the bison herds that roamed the plains
After all, they had to eat and you can’t eat if you don’t follow the food, right? Well, unfortunately, the winds on the plains could be quite strong – as I said before, they were quite a nuisance – this made starting a fire risky business.
If the wind picked up at the wrong moment, there could be a fire with near-infinite fuel raging across the plains.
There was also the added risk of being seen by enemy raiders, and they had to cook and eat. To get around these issues, they came up with this crazy idea – to build the fire underground.
By doing this, they kept the fire contained and avoided the troublesome elements and risk of a brush fire.
This method also allowed the fire to be easily concealed when necessary. Interestingly, however, keeping the fire concealed was not the original purpose of the Dakota fire pit.
It was primarily used while the Dakota tribes were out hunting bison because it allowed for a very hot fire that used very little fuel.
The Dakota fire pit was a simple project that worked really, really well and it’s still used by outdoorsmen today for cooking and boiling water.
How Does it Work?
So, now that we know a little bit about the backstory of the Dakota fire pit, let’s look at how it works.
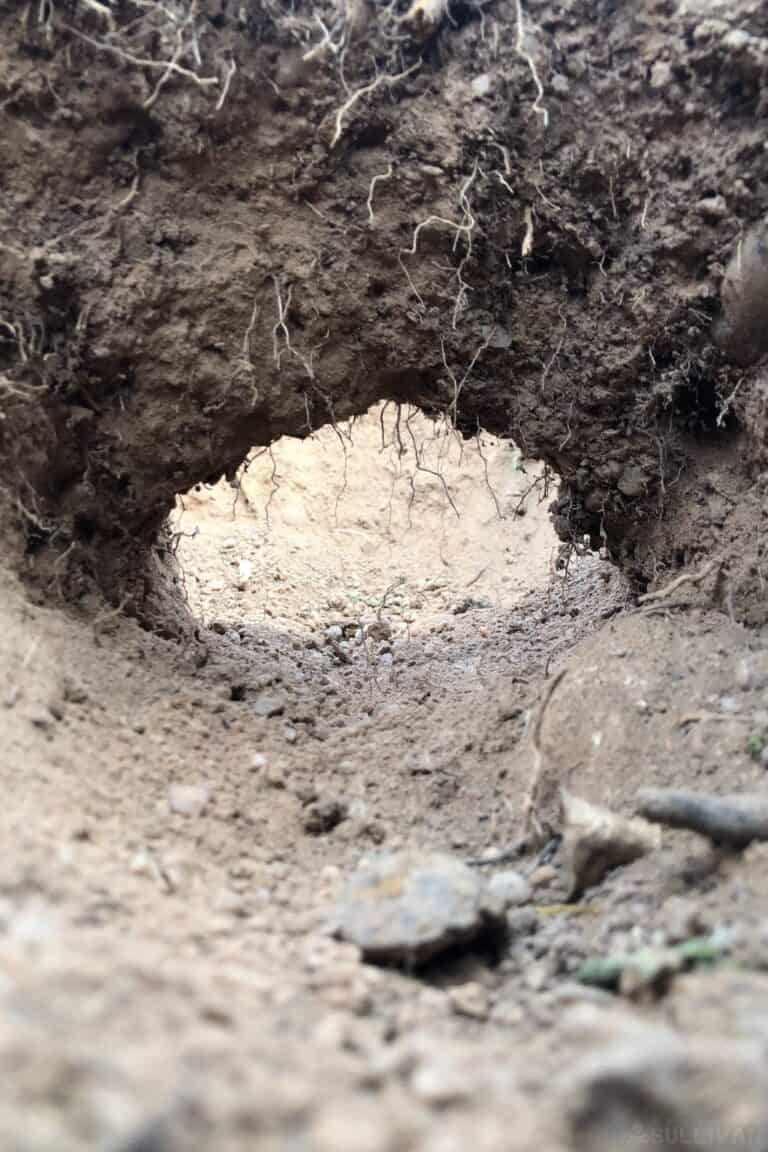
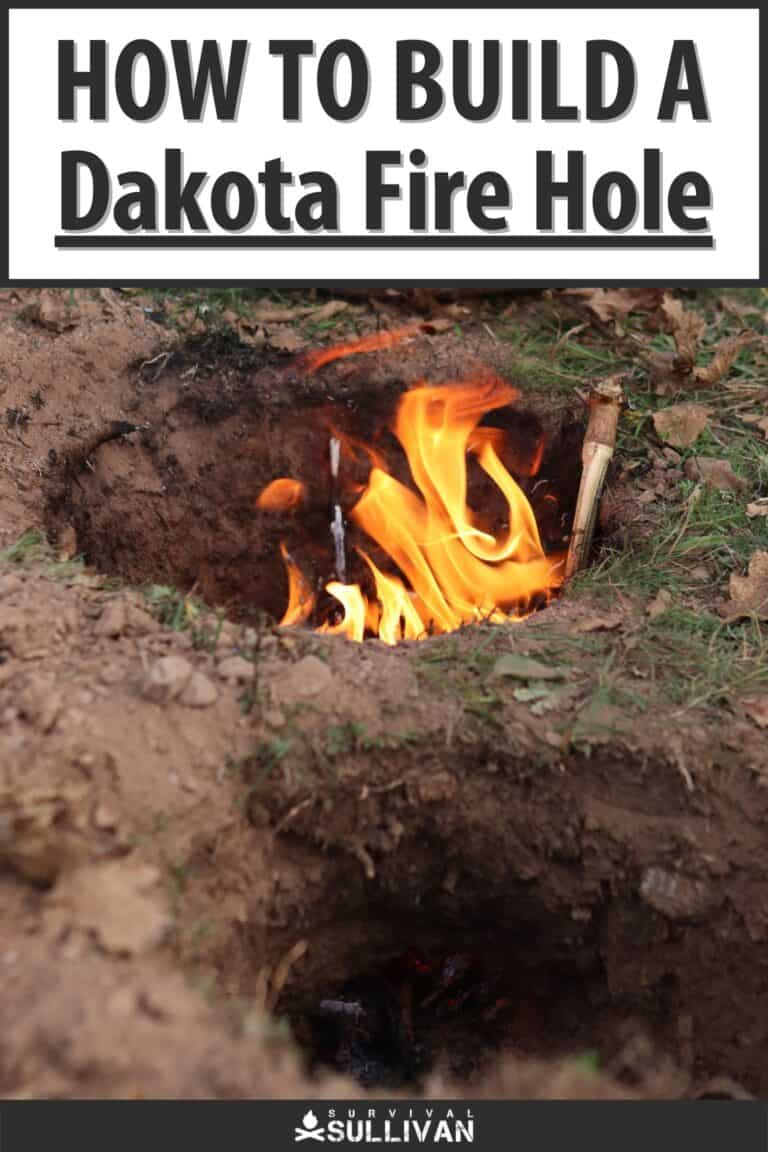
The fire pit actually consists of two pits that have been connected with a tunnel. The fire is set in one pit and the other stays empty. The empty pit is the oxygen supply, air goes into the pit and through the tunnel to the fire.
The hot air from the fire rises and creates suction which draws cooler, fresh air through the tunnel creating a looping effect.
This keeps the fire oxygenated allowing it to burn at a higher temperature for longer even while covered by a cooking pot. The fire itself loses very little heat as the hole protects it on all sides.
The Advantages of the Dakota Fire Pit
- The biggest advantage of the Dakota fire pit is that it’s simple. With two holes linked by a tunnel, it’s kind of difficult to mess that up.
- The airflow channels the heat straight to the cooking area which means you can use less fuel.
- Since it’s underground, the fire doesn’t produce as much smoke as a regular campfire. This is great for if you’re stealth camping as it helps with concealment. It’s also much easier to manage than your regular campfire.
- The size of the first hole confines the fire to a small space, this focuses the heat from the flame in one spot.
The Disadvantages of the Dakota Fire Pit
- Dakota fire pits have very particular geological needs. If the soil is too sandy, the hole won’t work well. Likewise, if there are lots of tree roots or rocks, you may not be able to dig at all.
- They’re also very time-consuming to build despite their simple design.
- This design is great for cooking as the heat is focused on the opening of the fire pit, but not good for keeping warm.
- Bad weather can also pose a serious problem. Rain, for example, will fill both the fire and oxygen pits with water rendering the fire pit useless until the rain’s gone and the water’s dried up.

Why Build a Fire in the Ground?
Well, for starters you’re out of the wind which means that you won’t have to worry about the fire being extinguished by a strong gust.
You also won’t have to worry about your embers being blown into the surrounding brush by high winds, re-igniting, and raging out of control.
Sometimes you just want to get away and not be noticed on a camping trip, having your fire underground makes it barely visible allowing you to stay unnoticed.
Another reason to build a fire in the ground is security in a disaster/survival situation.
Regular campfires are often very visible – depending on weather conditions and distance – and you often end up leaving a pile of ash behind when the fire’s out.
If you’re in a situation where that’s a bad thing (i.e. you don’t want certain people to find you), then building your fire underground makes a lot of sense.
Why? Because when you’re done you can just bury it – who’s going to know you were there if there’s no sign of a fire? It’s kind of hard to track someone if there’s little to no trace of them, isn’t it?
Are Smokeless Fire Pits Healthier?
Yes, since a smokeless pit uses less fuel, it’s not producing the same amount of smoke that a regular fire would.
This means you’re not inhaling as much, if any smoke, greatly reducing if not eliminating the risk of carbon monoxide poisoning and lung damage via smoke inhalation.
The smoke that is produced is typically dispersed by the fire itself before it reaches us so we avoid inhaling and smelling like smoke.
Where to Build your Dakota Fire Pit
A Dakota fire hole/pit can be made on any flat surface that’s been cleared of vegetation and debris (i.e. rocks).
If you’d like to further disperse the smoke, you can build the hole under a tree – just make sure it’s tall enough that it won’t catch fire.
You should avoid digging in areas where:
- The ground is very rocky – it’ll be harder to dig your hole with rocks in the way.
- The soil is loose and/or sandy. The soil must be able to keep its shape while you dig or you’re just going to be wasting your time constantly re-digging a collapsed hole.
- There are tree roots that you’ll have to cut through.
- The hole will probably fill with water easily.
Building Your Own Dakota Fire Pit in 3 Easy Steps
You don’t need much in order to build a Dakota fire pit…
- A flat surface that’s been cleared of vegetation and debris
- A spade/shovel to do the digging
- Rocks to hold your pot
You don’t really need much more than a shovel in order to make a Dakota fire pit because you’re basically just digging. You can also use it to clear the vegetation from the area where you want the pit to be.
Vegetation and debris can make digging the hole more than a little bit difficult – vegetation can also create a fire hazard. You can also grab a few rocks to line the fire side of the hole.
If you’re in a tight spot and you don’t have a shovel, you can use a strong stick to dig your Dakota fire pit.
Step 1: Check the Location
The first thing you want to do is check your location. Is the soil good for the pit (it’s not sandy or too rocky)? Keep an eye out for any potential hazards (i.e. flooding and fire) and changes in the weather conditions – i.e. wind direction.
Step 2: Mark Your Holes
This is the other important step because your holes need to be positioned in the right place if you want the pit to work.
The oxygen chamber should be around 8 inches (20 cm) in diameter and aimed toward the prevailing winds.
The fire pit/chamber should be about 10 inches (25 cm) in diameter and positioned downwind of the oxygen chamber with a distance of about 5-6 inches (8-10 cm) or so between the two holes (for the tunnel between them).
Step 3: Dig the First Hole
Once you’ve got your holes and tunnel marked, it’s time to start digging. Start by removing any vegetation (grass) from the area. When that’s been done, you dig the two holes.
The first hole that you’ll dig is the oxygen chamber, dig a hole with a slight downward slope (to allow air to enter the hole) with a diameter of about 15cm.
You want a reliable draft that will send air directly to the base of the fire and keep it oxygenated.
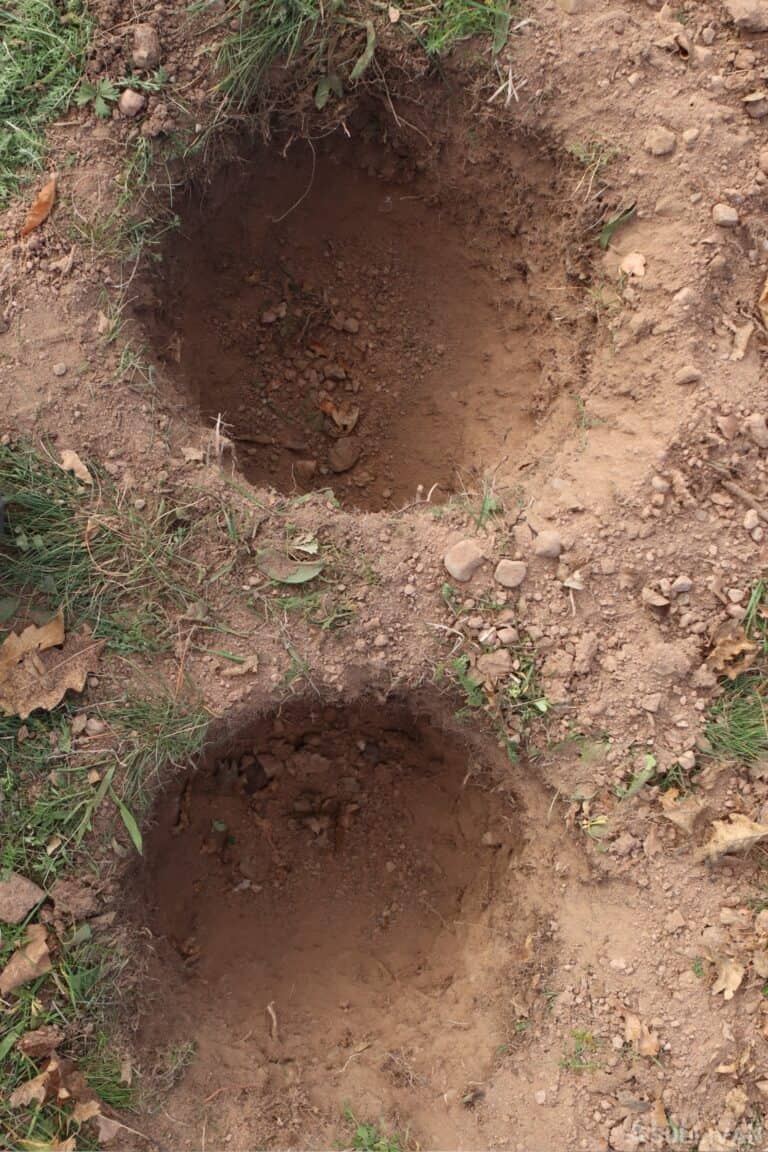
Notice how the diameter of the oxygen chamber is visibly smaller from the diameter of the fire chamber.
Step 4: Dig the Second Hole
When you’ve finished digging the oxygen chamber, you move on to the second hole. This one should be downwind of the oxygen chamber and around 25cm in diameter. It needs to be large enough to hold a small fire comfortably.
Step 5: Dig the Connection Tunnel
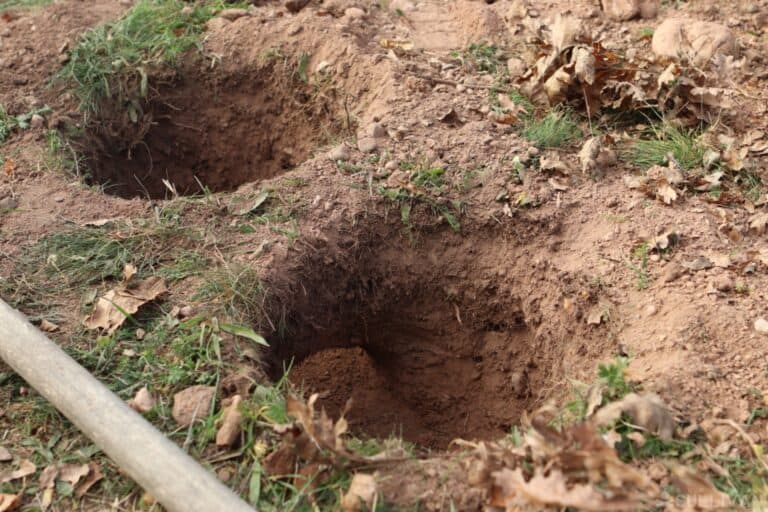
When the holes are dug, you dig the tunnel which should be roughly 20 cm long between the two holes and 15cm in diameter – you can change this if needed.
Lighting and Extinguishing Your Fire
When it comes to lighting your fire, you set it up the same way you would set up a regular campfire – the only difference is that you’re setting it up in a hole.
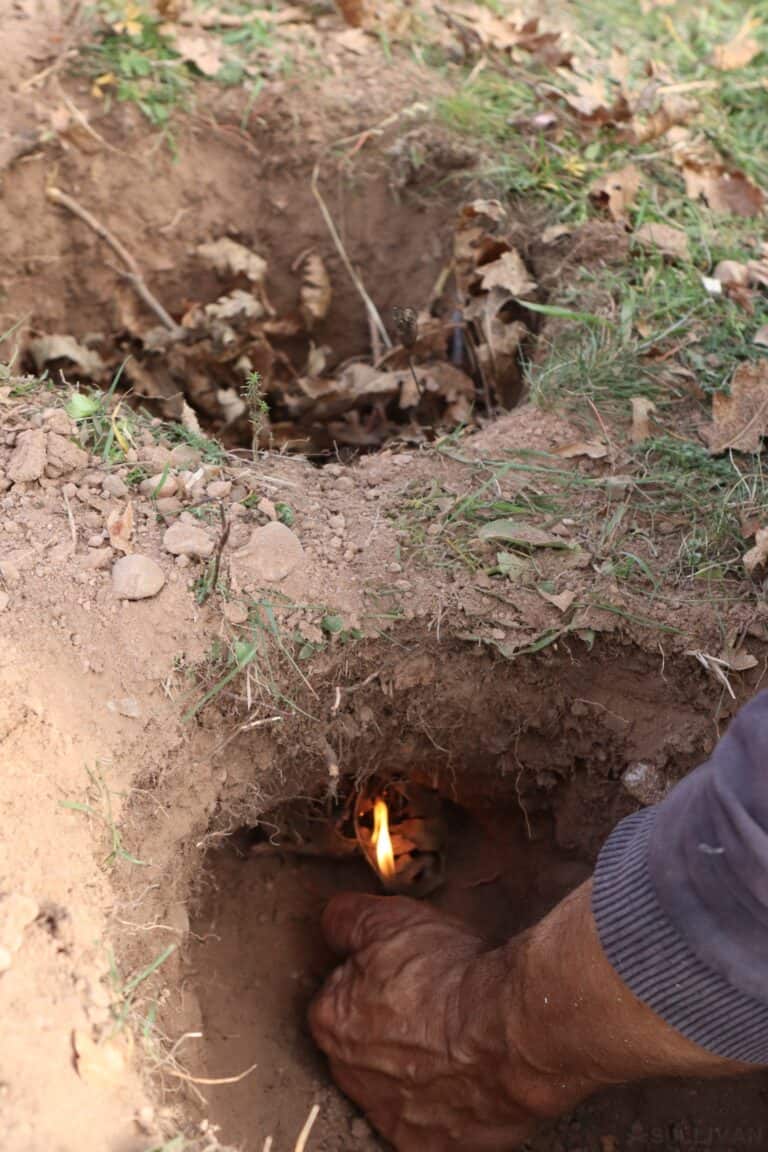
You use a bit of tinder and because you only have so much space to work with, small twigs as fuel. You can line the hole with rocks to hold your cooking pot/pan securely over the flame.
Adding fuel to the hole, simply lift the pot and drop new sticks into the fireside of the pit.
When you’re done with your fire, and you want to put it out, there are a couple of ways to do it…
One way is to throw dirt/sand into the hole over the fire, this starves the fire of oxygen which, of course, means it can’t burn.
Alternatively, you can let the fire burn through the fuel – just don’t leave the fire completely unattended (that’s just irresponsible).
FAQs
Who invented the Dakota Fire Hole? The basic concept of the fire hole can be found all over the world, but its original founding/invention is attributed to the Native American tribes of the Dakotas.
What’s the Point of a Dakota Fire Hole? The purpose of the Dakota Fire Hole is to have a tightly controlled heat source for camping and cooking that isn’t at risk of having the wind blow out the match/sparks.
Are Dakota Fire Holes smokeless? Almost. Dakota fire holes still produce smoke but they are incredibly hot-burning and don’t need much in the way of fuel to get going. The reduced fuel requirement means that you don’t end up with as much smoke as you’d get with a regular fire. Placing the hole under a tall tree allows you to disperse the smoke through the foliage.
How do Dakota Fire Holes work? Your oxygen chamber/pit is slightly sloped to allow the air to enter. Air flows through the tunnel to the fire pit/chamber and keeps things burning.
How deep do Dakota Fire Holes need to be? The depth of the hole depends on how far underground you want your fire to be. On average, however, a good depth is around 30cm.
The post How to build a Dakota Fire Hole (Step-by-Step with Pictures) appeared first on Survival Sullivan.
By: Greg Seebregts
Title: How to build a Dakota Fire Hole (Step-by-Step with Pictures)
Sourced From: www.survivalsullivan.com/building-a-dakota-fire-hole/
Published Date: Sun, 08 Jan 2023 16:00:00 +0000
------------------------
Did you miss our previous article...
https://bushcrafttips.com/bushcraft-news/video-stealth-camping-in-a-nissan-nv200-panel-van
 What is BushcraftSurvival SkillsToolsVideosBushcraft CampsBushcraft KitsBushcraft ProjectsPrivacy PolicyTerms And Conditions
