When most preppers think about sourcing protein in a wilderness survival scenario, or when bugging in near a forest for a long period of time, thoughts usually turn to hunting. And with good reason!
Yep, it worked!
Skilled hunters definitely have an advantage over mere gatherers. But unfortunately, when you are hunting, you can only be in one place at one time.
Smart preppers will take up trapping to get more food with less effort. You can set up multiple traps in different locations, and a good trap will work without you there to babysit it. It’s the perfect way to multiply your efforts.
When it comes to bang for your buck, the best trap by far is a small pitfall. Able to catch insects and smaller rodents, it’s easy and safe to place and does not require resetting, only periodic checking.
Whether you plan on eating what you catch or using it as bait for even larger game, this is the perfect trap for beginners to add to their survival toolbox. Keep reading, and I’ll tell you how to make it.
Tools and Supplies
You don’t need much to make this trap, and I guarantee you’ll have everything you need around your house right now, or you can easily scavenge it from trash found in the wild.
Container: This is the core of the trap. Any kind of plastic or glass cup can work as long as it has vertical sides and a slick finish on the inside that bugs and rodents will be unable to climb.
Good options include plastic food containers, plastic storage tubs, and glass bowls. Note that you will need one container for every trap you want to place; placing multiple traps in an area or in hotspots is a great way to increase yield!
Trowel or Shovel: Any convenient digging tool will make short work of the task at hand. If you are at or near your home, a garden trowel is perfect.
If you are on the move or bugging out, a small camp shovel or e-tool is ideal. In a pinch, you can always use your hands or a flat rock to scrape out a spot for your container.
Cover: You’ll need any flat, sturdy object that will completely cover the top of your container. A scrap piece of board is perfect, but a rock that’s flat on one side, an old kitchen tile, a plastic lid, or even a rough-hewn plank of wood will work perfectly.
Small Rocks: You’ll need one or several small rocks to hold up the flat cover that goes over the container. You should experiment with the size of the rocks depending on the type of game you’re after.
Mice or rats will need a larger gap to crawl through, while insects will only need a small one. Accordingly, these rocks should be a little taller or a little shorter depending on your target.
Bait: Optional, but a great way to attract game, especially rodents. Insects tend to be pretty dumb and will blunder into your trap as they wander, but you might need to entice rodents to enter.
Consider using seeds, peanut butter, tuna, or other highly attractive baits. Use only a little bit so you don’t attract larger animals, which will destroy and raid your trap.
Making Your Pitfall Trap, Step-by-Step
Placing and setting this trap is as easy as it gets. Nonetheless, read over the instructions in their entirety before you begin so you know what to expect.
Step 1: Clean the container. Take a moment to clean the inside of your container before you begin. You want to get rid of any sticky residue that might allow bugs or mice to get a purchase on the walls of the container.
Similarly, any chemical residue could poison the game and contaminate your food. Once the container is reasonably clean, you’re ready to begin.
Step 2: Pick a spot. The most important factor when trapping is picking the right location. Traps should be placed on trails that game uses or areas where they frequent.
Rodents typically follow the path of least resistance where they have cover, concealment, and a wall or solid obstacle on one side. Bugs wander more or less randomly but are attracted to various plants and food sources.
Once you have a location picked out, make sure you have a patch where you can bury your container completely and perfectly flush with the surface. Disturb it as little as possible and prepare to dig.
Step 3: Dig a hole. Start digging out a hole for your container. The idea is to place the container in the ground and keep the lip or rim perfectly flush with the surrounding surface—neither too high nor too low. Just right!
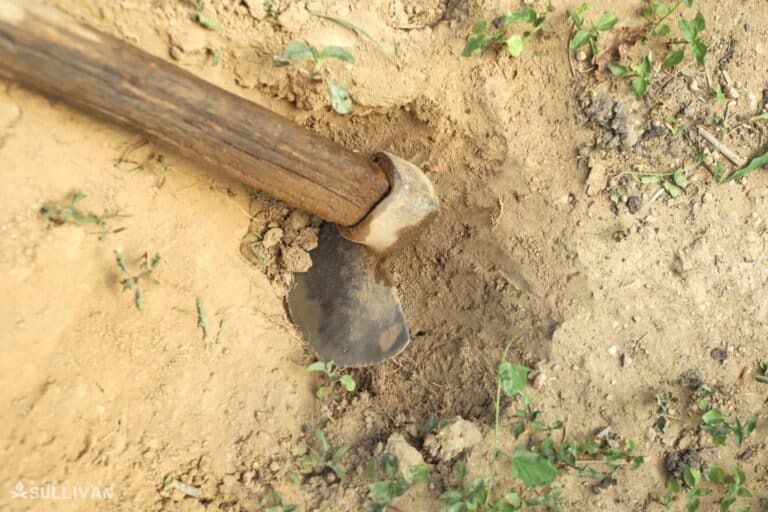
digging hole in the ground
Step 4: Place the container, fill, replace dirt, level. Set your container in the ground and add a small handful of dirt, leaves and twigs from the nearby area. This will help captured prey stay calm and less likely to attempt escape.
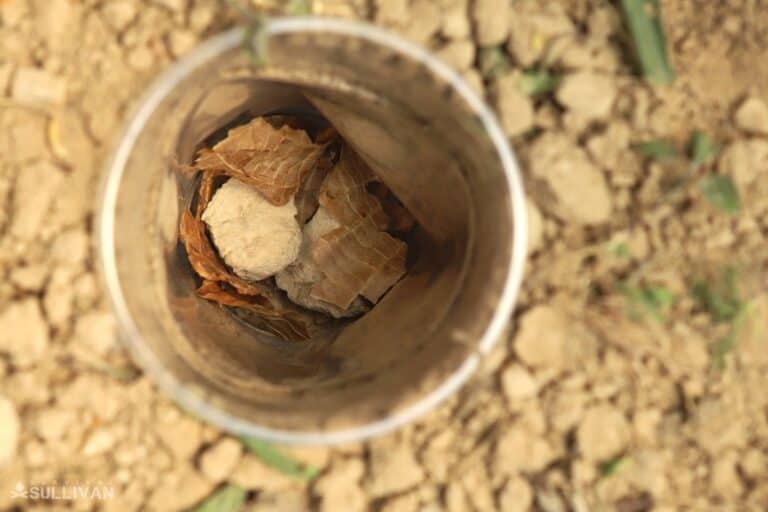
pitfall trap with bedding
Then, level the container and backfill any excess dirt, tamping it down firmly so the consistency is similar to the surroundings again. Put back any leaves, twigs, and other detritus around the perimeter so you don’t spook intelligent game.
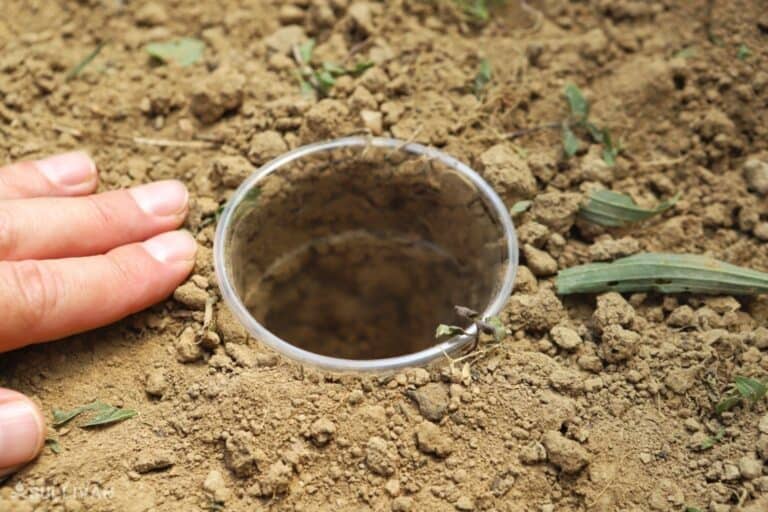
plastic cup buried inside hole in ground
Remember, it’s crucially important that you keep the lip of the container perfectly level with the ground. This is important because the critters you are after—bugs and rodents—will see even a slight rise as an obstacle, not a speed bump.
You don’t want to make the clearance between the cover over the trap and the opening too narrow. Take the time to get this just right.
Step 5: Bait the trap. If you are using bait, place a little bit in the bottom of the container, right in the middle.
Step 6: Place the cover. Grab whatever item you are using as a cover, along with the small stones or other objects you’re using to prop it up.
Place one at each corner of the container, now in the ground, and then set the cover on them. This will help deter larger animals from investigating your trap and make it much harder for any critter you catch to escape.
Step 7: Place a weight on the cover. If you aren’t using a stone or a heavier piece of wood as your cover, grab some rocks or a few handfuls of soil and place them on top of the cover to help hold it down. IMG_8886
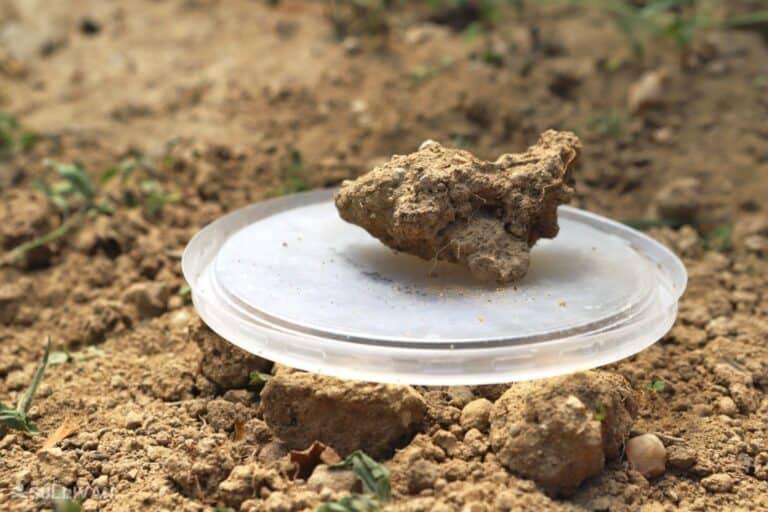
small rock on top of plastic lid
Step 8: Check the clearance. As the last step, make sure the entrance is clear on all sides of the trap so that your prey can get inside. Carefully pull back any dirt or debris to open it up more if needed.
Step 9: Wait. Now the hard part—waiting. Clear the area and let things return to normal. Come back to check on your trap later for any visitors.
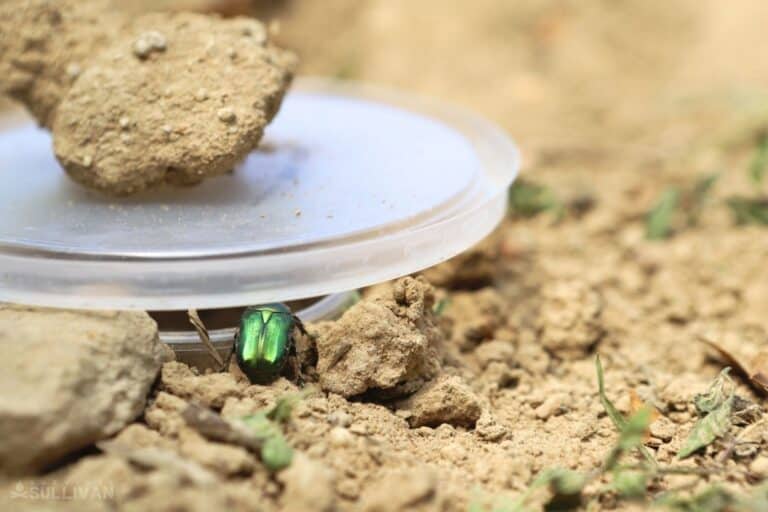
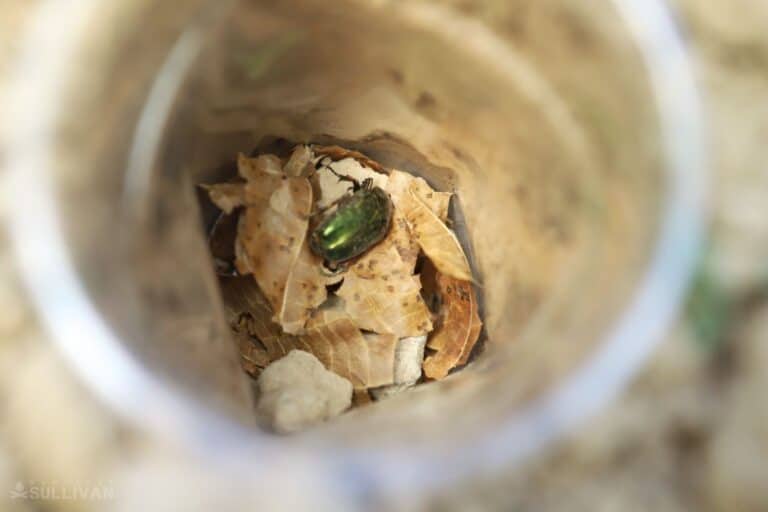
insect falling into the pitfall trap
Step 10: Repeat if needed. If you are placing multiple versions of this trap, you’re done with the first one. Move on to another area and repeat these steps until you’ve placed the desired amount.
Step 11: Done! You’re all done. With a little luck, you’ll soon have a collection of edible insects!
Check the Trap Regularly
These traps are not something you want to leave and check only a couple of times a week.
Aside from the small creatures inside quickly dying from dehydration or starvation, their very presence might attract larger predators who will easily uncover the trap and steal them from you.
Because of this, you need to check it regularly, but not so often that the prey animals in the area learn to anticipate and fear your presence, staying hidden or going somewhere else.
I suggest you check it in the morning and again in the evening before you go to bed. This is a long enough interval to encourage little creatures to move around, but not so long that they are likely to escape or get taken if your trap is working properly.
Making Adjustments
Nothing is more disappointing than coming upon one of your traps that seemingly functioned but didn’t bag any game. If this happens, you need to investigate like a detective would.
Is the bait missing? That means whatever got it could either reach it without entering the trap, or could enter the trap and then get back out again.
Look closely at the sides of the container: are there marks or greasy spots that could indicate tiny, climbing claws or something slithering up and back out of the trap?
Is the cover disturbed or flipped over? That certainly indicates something larger raided your trap, or that the cover itself is much too light and was easily pushed out of the way.
If you see any detritus from insect bodies, blood, or hair nearby, you can bet that a larger predator of some kind got to your trap before you. Maybe check it more frequently next time, or set up and try to bag the predator!
Whatever happens, make little adjustments and try again. Trapping is just as much art as science, even with a trap as simple as this one.

The post DIY Pitfall Trap to Catch Food in the Woods appeared first on Survival Sullivan.
By: Tom Marlowe
Title: DIY Pitfall Trap to Catch Food in the Woods
Sourced From: www.survivalsullivan.com/diy-pitfall-trap/
Published Date: Fri, 04 Oct 2024 12:12:12 +0000
------------------------
Did you miss our previous article...
https://bushcrafttips.com/bushcraft-news/20-tools-the-pioneer-had-that-youll-need-postshtf
 What is BushcraftSurvival SkillsToolsVideosBushcraft CampsBushcraft KitsBushcraft ProjectsPrivacy PolicyTerms And Conditions